Skip to content
assostro-header-logo
assistro
  • Integrations
    • Zapier
    • Shopify
    • HubSpot
    • WordPress
    • Chrome Extension
    • Metro Accounting (Coming soon)
    • Flavor CRM (Coming soon)
  • Learn
    • Blog
    • Developer Guide
    • User Guide
    • Tutorial
  • Pricing
  • Contact Us
  • Get Started
Get Started

SyncMate

9
  • Troubleshooting and Reconnection Guide
  • Connect your WooCommerce App with SyncMate
  • How to send automated WhatsApp messages on Google Calendar events?
  • Connect your Contact Form 7 App with SyncMate
  • Connect your HubSpot App with SyncMate
  • How to use SyncMate X Shopify Application ?
  • How to fetch WhatsApp Group ID – Guide to Fetch Group ID with Video
  • How to Connect your WhatsApp with SyncMate?
  • Connect your Custom App with SyncMate

Other

6
  • After Installation : Setting up SyncMate Chrome Extension
  • Assistro Dashboard
  • How to back up your WhatsApp chats in HubSpot?
  • Getting Started with SyncMate and Shopify Integration: A Step-by-Step Guide
  • How to use SyncMate in a 3rd Party application via OAuth – The Secure way
  • SyncMate User Guide: Regenerating Your Token

Extension

4
  • Bulk messaging at a scheduled time using SyncMate
  • How to Save a WhatsApp Contact to HubSpot Using SyncMate?
  • Send Message at a scheduled time using SyncMate
  • Define your own template to send schedule message

Developer Guide

2
  • SyncMate User Guide: Regenerating Your Token
  • Connect your Custom App with SyncMate

Tutorial

2
  • Use WhatsApp API with Custom applications using SyncMate
  • SyncMate Introduction Video
View Categories
  • Home
  • user-guide
  • Extension
  • How to Save a WhatsApp Contact to HubSpot Using SyncMate?

How to Save a WhatsApp Contact to HubSpot Using SyncMate?

< 1 min read

Step 1: #

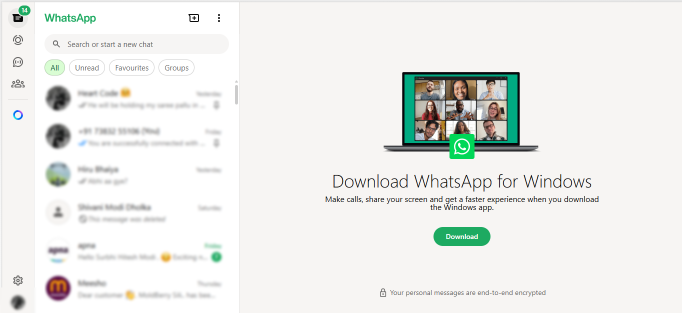
Open “WhatsApp Web” in your browser.

WhatsApp Web


Step 2: #

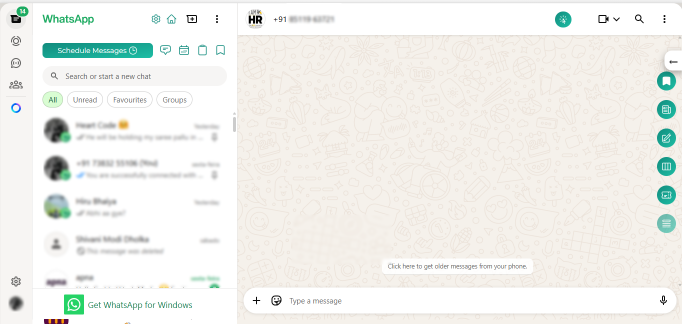
Open the chat of the contact you want to save to HubSpot.

Open your WhatsApp Web.

Step 3: #

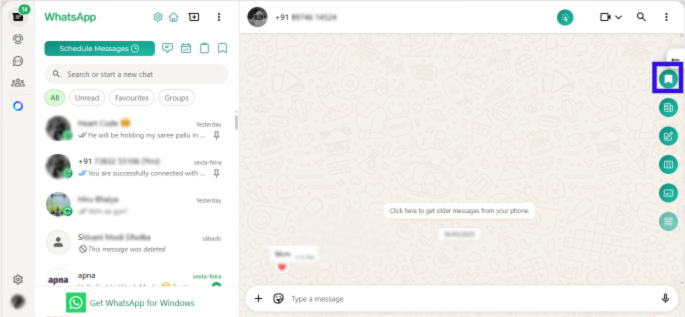
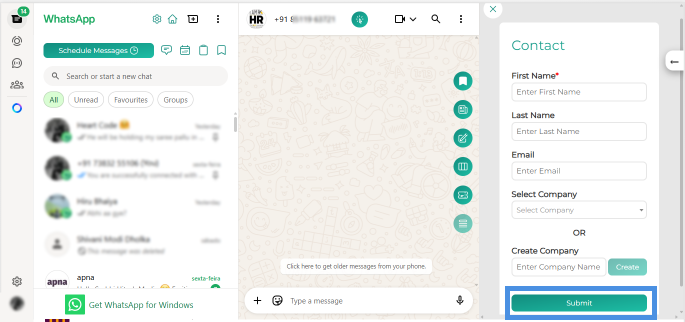
 On the right-hand sidebar, you’ll see green SyncMate icons. Click on the “Save Contacts” icon.

Open the chat of that person whose contact you wanted to save.

Step 4: #

 A form will appear; fill in the required details, and click Submit.
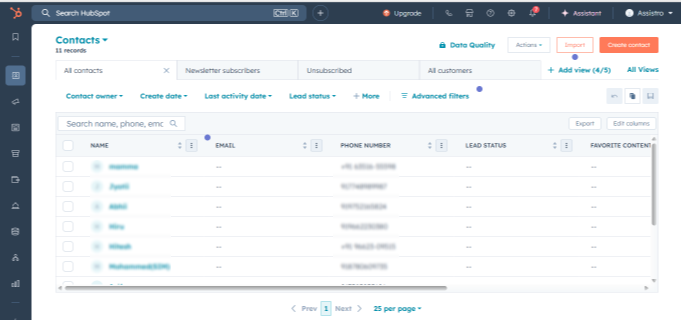
Submitting the contact form.


Step 5: #

Log in to your HubSpot account, refresh the Contacts page, and you’ll see the new contact saved successfully.


HubSpot Contact Page

Updated on September 15, 2025

What are your Feelings

  • Happy
  • Normal
  • Sad
Share This Article :
  • Facebook
  • X
  • LinkedIn
  • Pinterest
Send Message at a scheduled time using SyncMate
Table of Contents
  • Step 1:
  • Step 2:
  • Step 3:
  • Step 4:
  • Step 5:
assistro

We’re your innovation partner, delivering cutting-edge solutions that elevate your business to the next level.


    Navigation

    • Integrations
    • Pricing
    • Contact Us

    Integrations

    • Zapier
    • Shopify
    • HubSpot
    • Wordpress
    • Chrome Extension
    • Metro Accounting [Coming soon]
    • Flavor CRM [Coming soon]

    Learn 

    • Blogs
    • Developers
    • User Guide
    • Tutorials

    © Copyright 2025, All Rights Reserved by Assistro