Skip to content
assostro-header-logo
assistro
  • Integrations
    • Zapier
    • Shopify
    • HubSpot
    • Make
    • N8N
    • Chrome Extension
      • HubSpot
      • ClickUp
      • Monday.com
    • Flavor CRM
    • WordPress (Coming soon)
    • Metro Accounting (Coming soon)
  • Learn
    • Blog
    • Developer Guide
    • User Guide
    • Tutorial
  • Pricing
  • Contact Us
  • Get Started
Get Started

Extension

5
  • Define your own template to send schedule message
  • Send Message at a scheduled time using SyncMate
  • Bulk messaging at a scheduled time using SyncMate
  • Sending a Direct Message Without Saving a Number on WhatsApp
  • An onboarding guide for Extension

Other

11
  • How to use SyncMate in a 3rd Party application via OAuth – The Secure way
  • Assistro Dashboard
  • After Installation : Setting up SyncMate Chrome Extension
  • Getting Started with SyncMate and Shopify Integration: A Step-by-Step Guide
  • SyncMate User Guide: Regenerating Your Token
  • How to back up your WhatsApp chats in HubSpot?
  • How to Keep Your WhatsApp Account Safe & Avoid Bans
  • Resolving Message Sending Failures
  • How to Subscribe to a Plan
  • How to Cancel Your Subscription
  • How to Add More Message Credits

SyncMate

6
  • How to Connect your WhatsApp with SyncMate?
  • Connect your WooCommerce App with SyncMate
  • Connect your Contact Form 7 App with SyncMate
  • Troubleshooting and Reconnection Guide
  • How to use SyncMate X Shopify Application ?
  • How to send automated WhatsApp messages on Google Calendar events?

Developer Guide

3
  • SyncMate User Guide: Regenerating Your Token
  • How to Set Up Webhooks for WhatsApp Events in SyncMate
  • Connect your Custom App with SyncMate

Tutorial

2
  • SyncMate Introduction Video
  • Use WhatsApp API with Custom applications using SyncMate

HubSpot

9
  • Connect your HubSpot App with SyncMate
  • How to Save a WhatsApp Contact to HubSpot Using SyncMate?
  • How to create a Deal for a WhatsApp Contact in HubSpot via SyncMate?
  • How to Create a Note for a WhatsApp Contact in HubSpot using SyncMate?
  • How to Create a Task for a WhatsApp Contact in HubSpot using SyncMate?
  • How to Create a Ticket for a WhatsApp Contact in HubSpot through SyncMate?
  • How to Create a Log for a WhatsApp Contact in HubSpot through SyncMate?
  • How to Back Up and associate Your Contacts’ Data in HubSpot?
  • An Onboarding Guide for HubSpot Via SyncMate

Zapier

7
  • How to fetch WhatsApp Group ID – Guide to Fetch Group ID
  • How to fetch WhatsApp Channel or Newsletter ID – Guide to Fetch Channel or Newsletter ID
  • How to connect Zapier with SyncMate?
  • How to send a WhatsApp notification to any individual?
  • How to send a WhatsApp Notification to any group or channel?
  • An onboarding guide for Zapier via SyncMate
  • How to connect Flavor CRM with SyncMate?

N8N

2
  • How to Send WhatsApp Messages via Assistro in n8n?
  • Connect your N8N with SyncMate

Shopify

1
  • Connect your Shopify with SyncMate

make

1
  • Connect your Make with SyncMate

Pabbly

1
  • Connect your Pabbly with SyncMate

Monday

1
  • Connect your Monday App with SyncMate

Integrately

1
  • Connect your Integrately with SyncMate
View Categories
  • Home
  • user-guide
  • Extension
  • Send Message at a scheduled time using SyncMate

Send Message at a scheduled time using SyncMate

< 1 min read

SyncMate has introduced a new feature called Schedule Messages. This feature will help users send messages to their customers at a scheduled time in a defined template.
To use the Message Scheduler feature of SyncMate, you need to follow the simple steps mentioned below:

Step 1: #

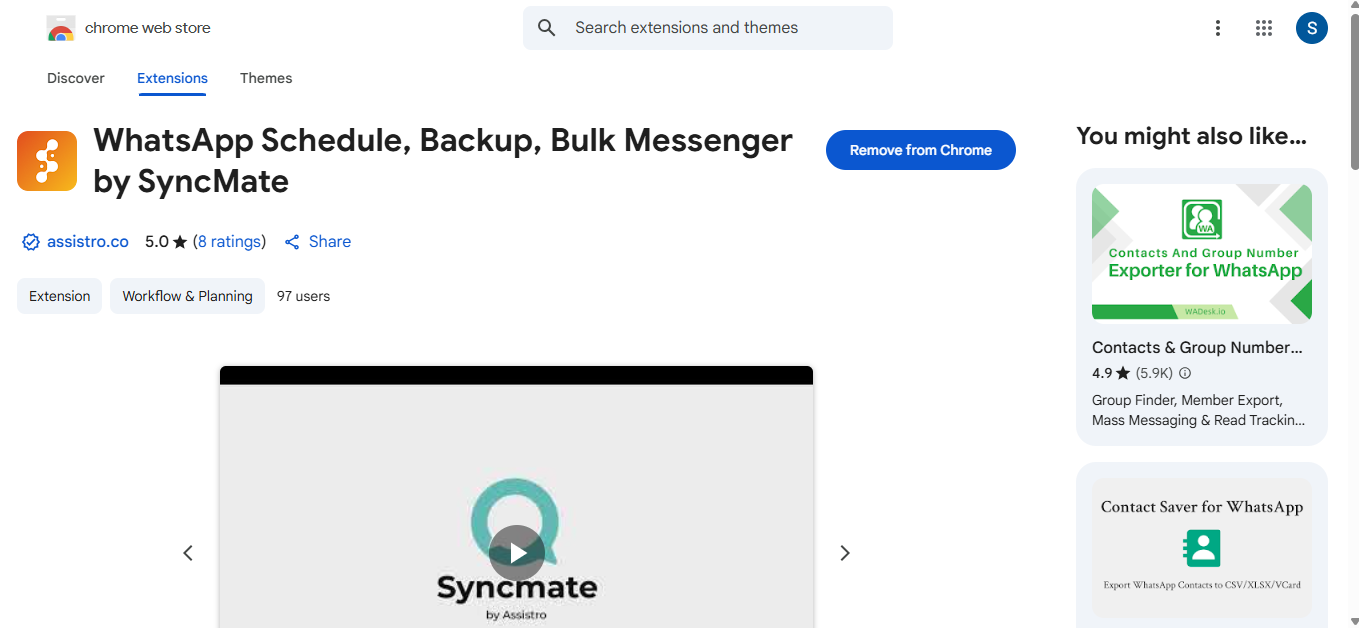
Add the SyncMate extension to your browser.

WhatsApp Schedule, Backup, Bulk Messenger by SyncMate

#
Step 2: #

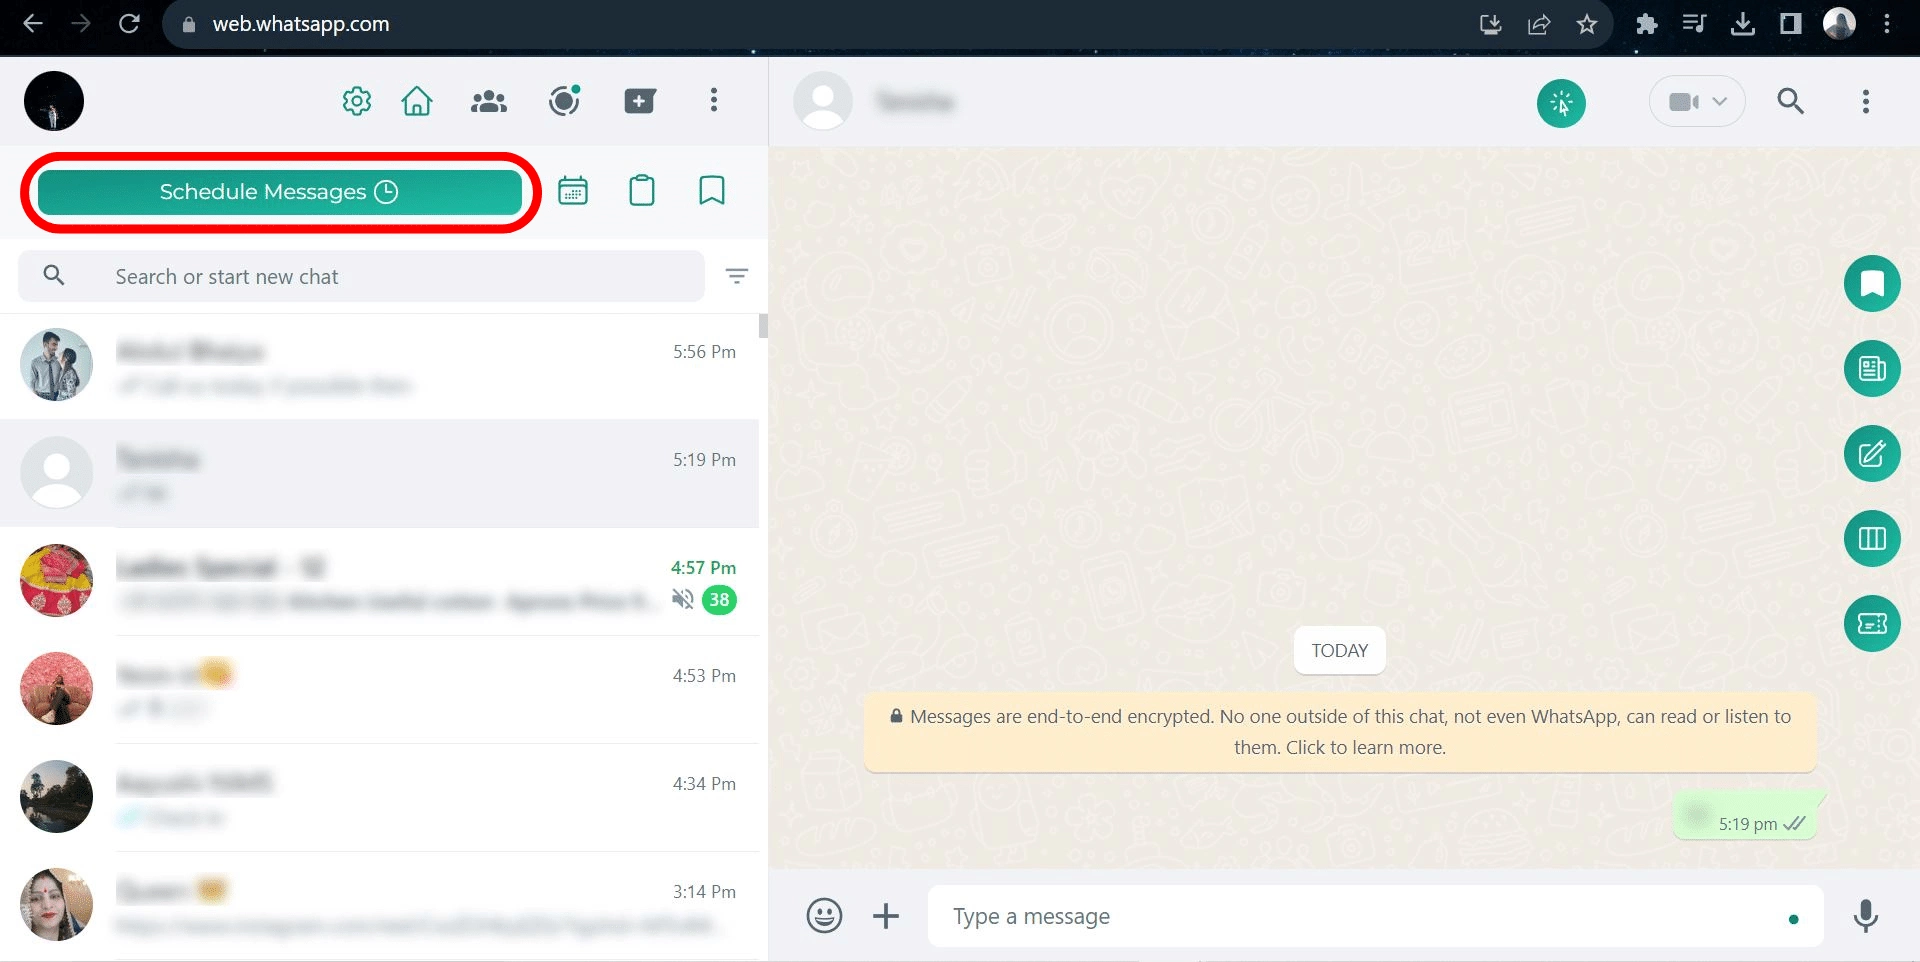
Visit WhatsApp and click on the Schedule Message option.

#
Step 3: #

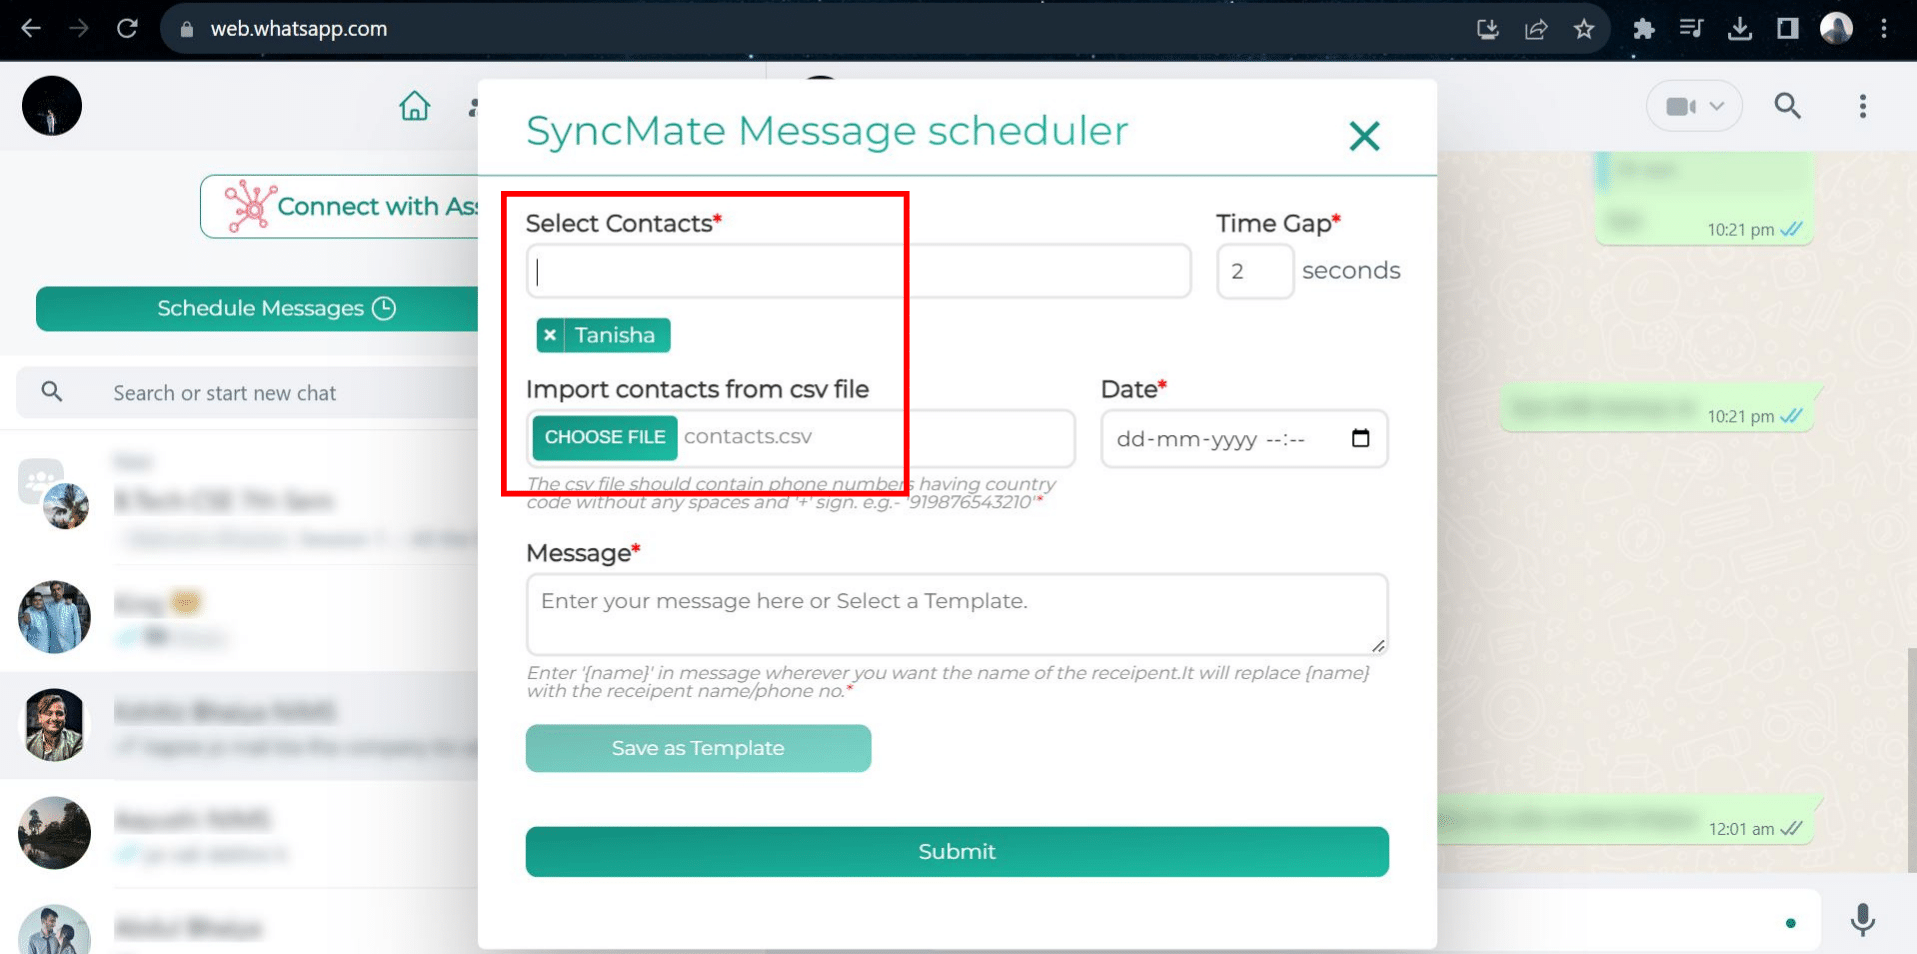
Import your contacts as a .csv file and select the contact you want to send a  message to.
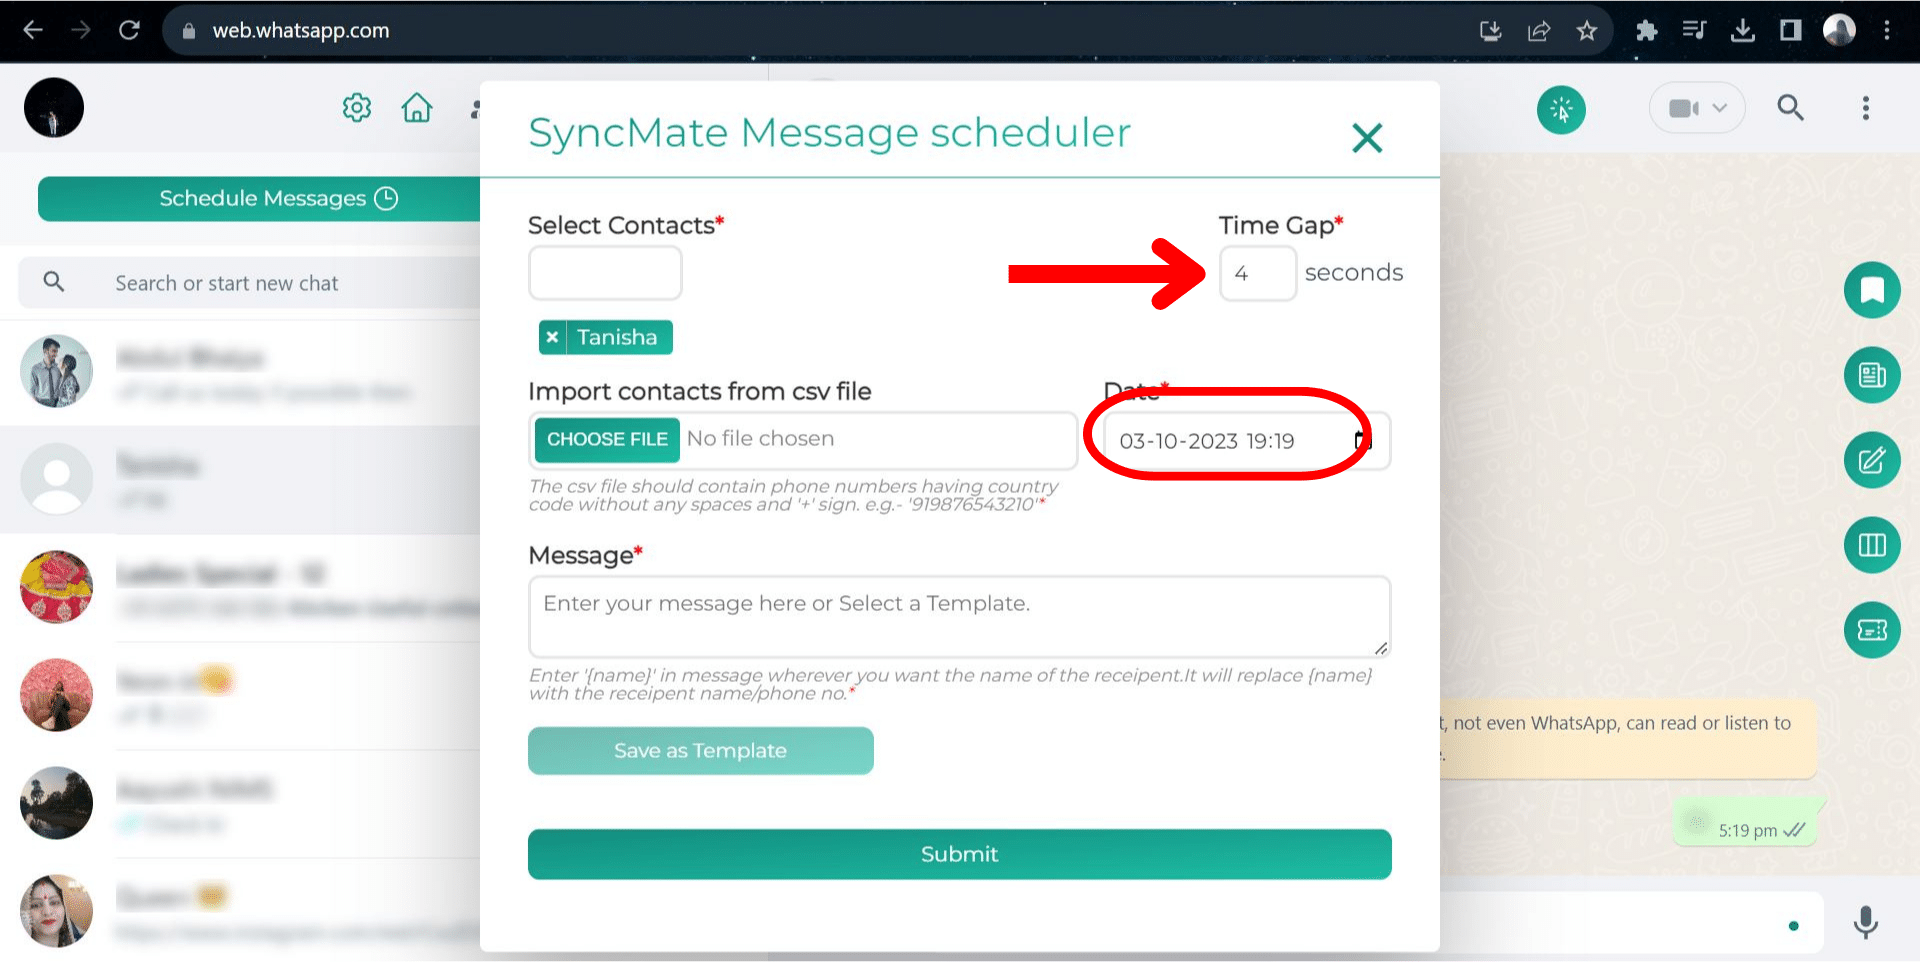
#
Step 4: #

Select the date and time that you want the message to be sent.
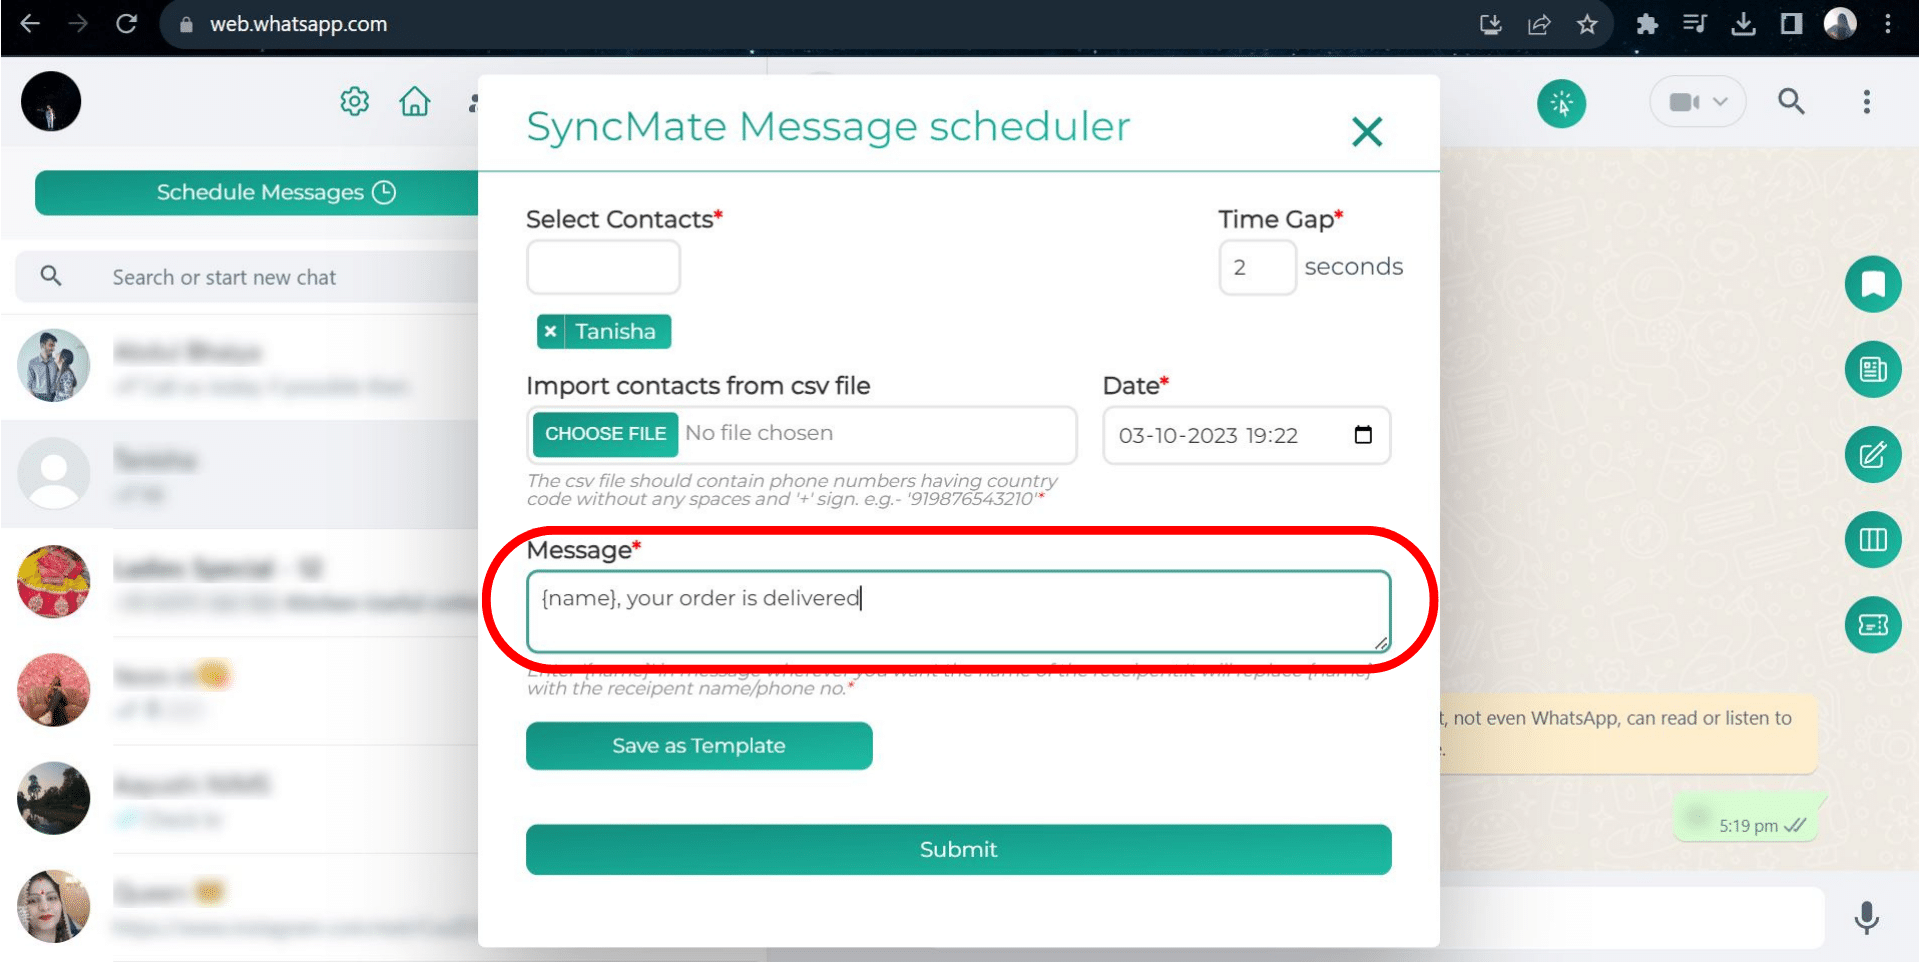
#
Step 5: #

Enter the message that you want to send in the message box.
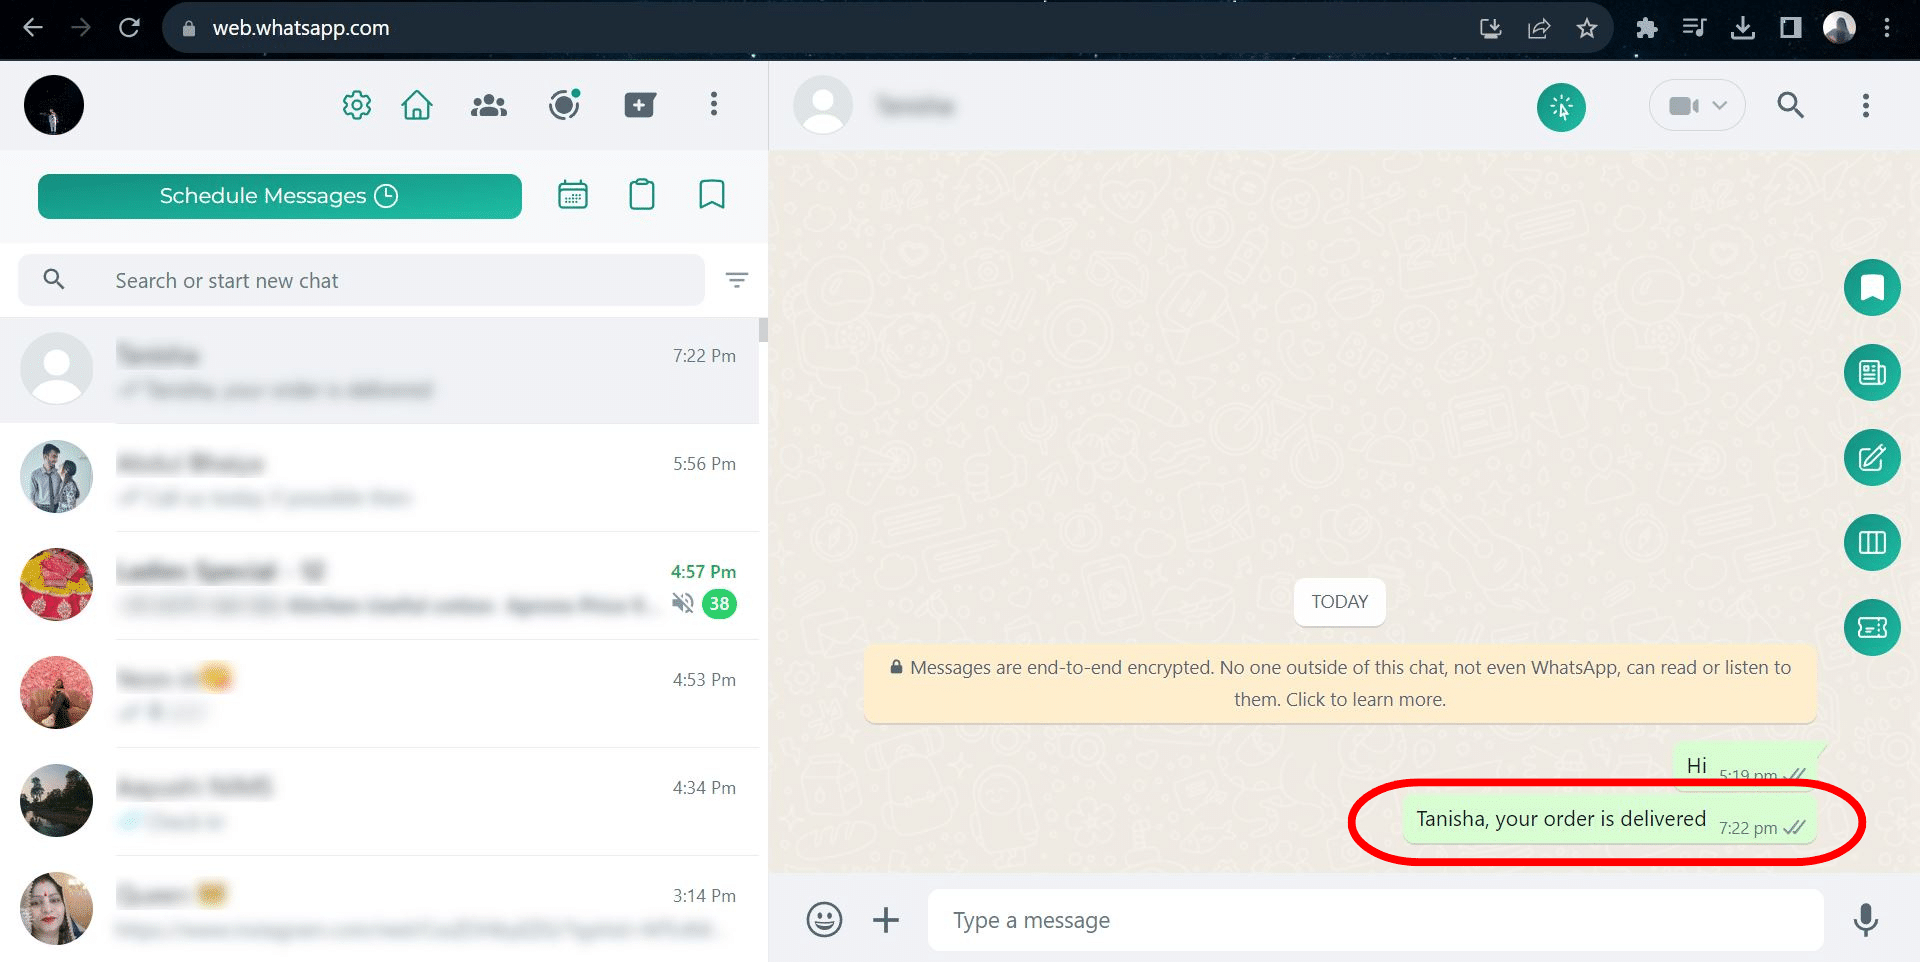
If you write {name} followed by the message then {name} will be replaced by either the customer’s name or by the customer’s phone number when the message is delivered.
Along with this, you can also save a template that can be later used to send messages.

#
Step 6: #

Once all is done, click on the submit button and the message will be delivered at its scheduled time.

Updated on September 11, 2025

What are your Feelings

  • Happy
  • Normal
  • Sad
Share This Article :
  • Facebook
  • X
  • LinkedIn
  • Pinterest
Table of Contents
  • Step 1:
  • Step 2:
  • Step 3:
  • Step 4:
  • Step 5:
  • Step 6:
assistro

We’re your innovation partner, delivering cutting-edge solutions that elevate your business to the next level.


    Navigation

    • Integrations
    • Pricing
    • Contact Us

    Integrations

    • Zapier
    • Shopify
    • HubSpot
    • Wordpress
    • Chrome Extension
    • Metro Accounting [Coming soon]
    • Flavor CRM [Coming soon]

    Learn 

    • Blogs
    • Developers
    • User Guide
    • Tutorials

    © Copyright 2025, All Rights Reserved by Assistro

    WhatsApp is now inside your CRM!

    Install our new free Chrome extension to link WhatsApp chats directly to HubSpot, ClickUp, and Monday.com without ever switching tabs.

    Link WhatsApp chats directly to HubSpot, ClickUp, and Monday.com without ever switching tabs.  Install Now