Skip to content
assostro-header-logo
assistro
  • Integrations
    • Zapier
    • Shopify
    • Hubspot
    • WordPress
    • Chrome Extention
    • Metro Accounting (Coming soon)
    • Flavor CRM (Comming soon)
  • Learn
    • Blog
    • Developer Guide
    • User Guide
    • Tutorial
  • Pricing
  • Contact Us
  • Get Started
Get Started

SyncMate

9
  • Connect your HubSpot App with SyncMate
  • Connect your WooCommerce App with SyncMate
  • Connect your Contact Form 7 App with SyncMate
  • Troubleshooting and Reconnection Guide
  • How to use SyncMate X Shopify Application ?
  • How to send automated WhatsApp messages on Google Calendar events?
  • How to Send Message to a WhatsApp Group – Guide to Fetch Group ID
  • How to Connect your WhatsApp with SyncMate?
  • Connect your Custom App with SyncMate

Other

6
  • How to use SyncMate in a 3rd Party application via OAuth – The Secure way
  • Assistro Dashboard
  • After Installation : Setting up SyncMate Chrome Extension
  • Getting Started with SyncMate and Shopify Integration: A Step-by-Step Guide
  • How to back up your WhatsApp chats in HubSpot?
  • SyncMate User Guide: Regenerating Your Token

Extension

3
  • Define your own template to send schedule message
  • Send Message at a scheduled time using SyncMate
  • Bulk messaging at a scheduled time using SyncMate

Developer Guide

2
  • SyncMate User Guide: Regenerating Your Token
  • Connect your Custom App with SyncMate

Tutorial

2
  • Use WhatsApp API with Custom applications using SyncMate
  • SyncMate Introduction Video
View Categories
  • Home
  • user-guide
  • SyncMate
  • Connect your Contact Form 7 App with SyncMate

Connect your Contact Form 7 App with SyncMate

< 1 min read

To connect your  Contact Form 7 App with SyncMate, you need to follow the easy steps below:

Step 1
First of all, you will need to connect your WhatsApp with SyncMate, follow the Configuration guide.


Step 2

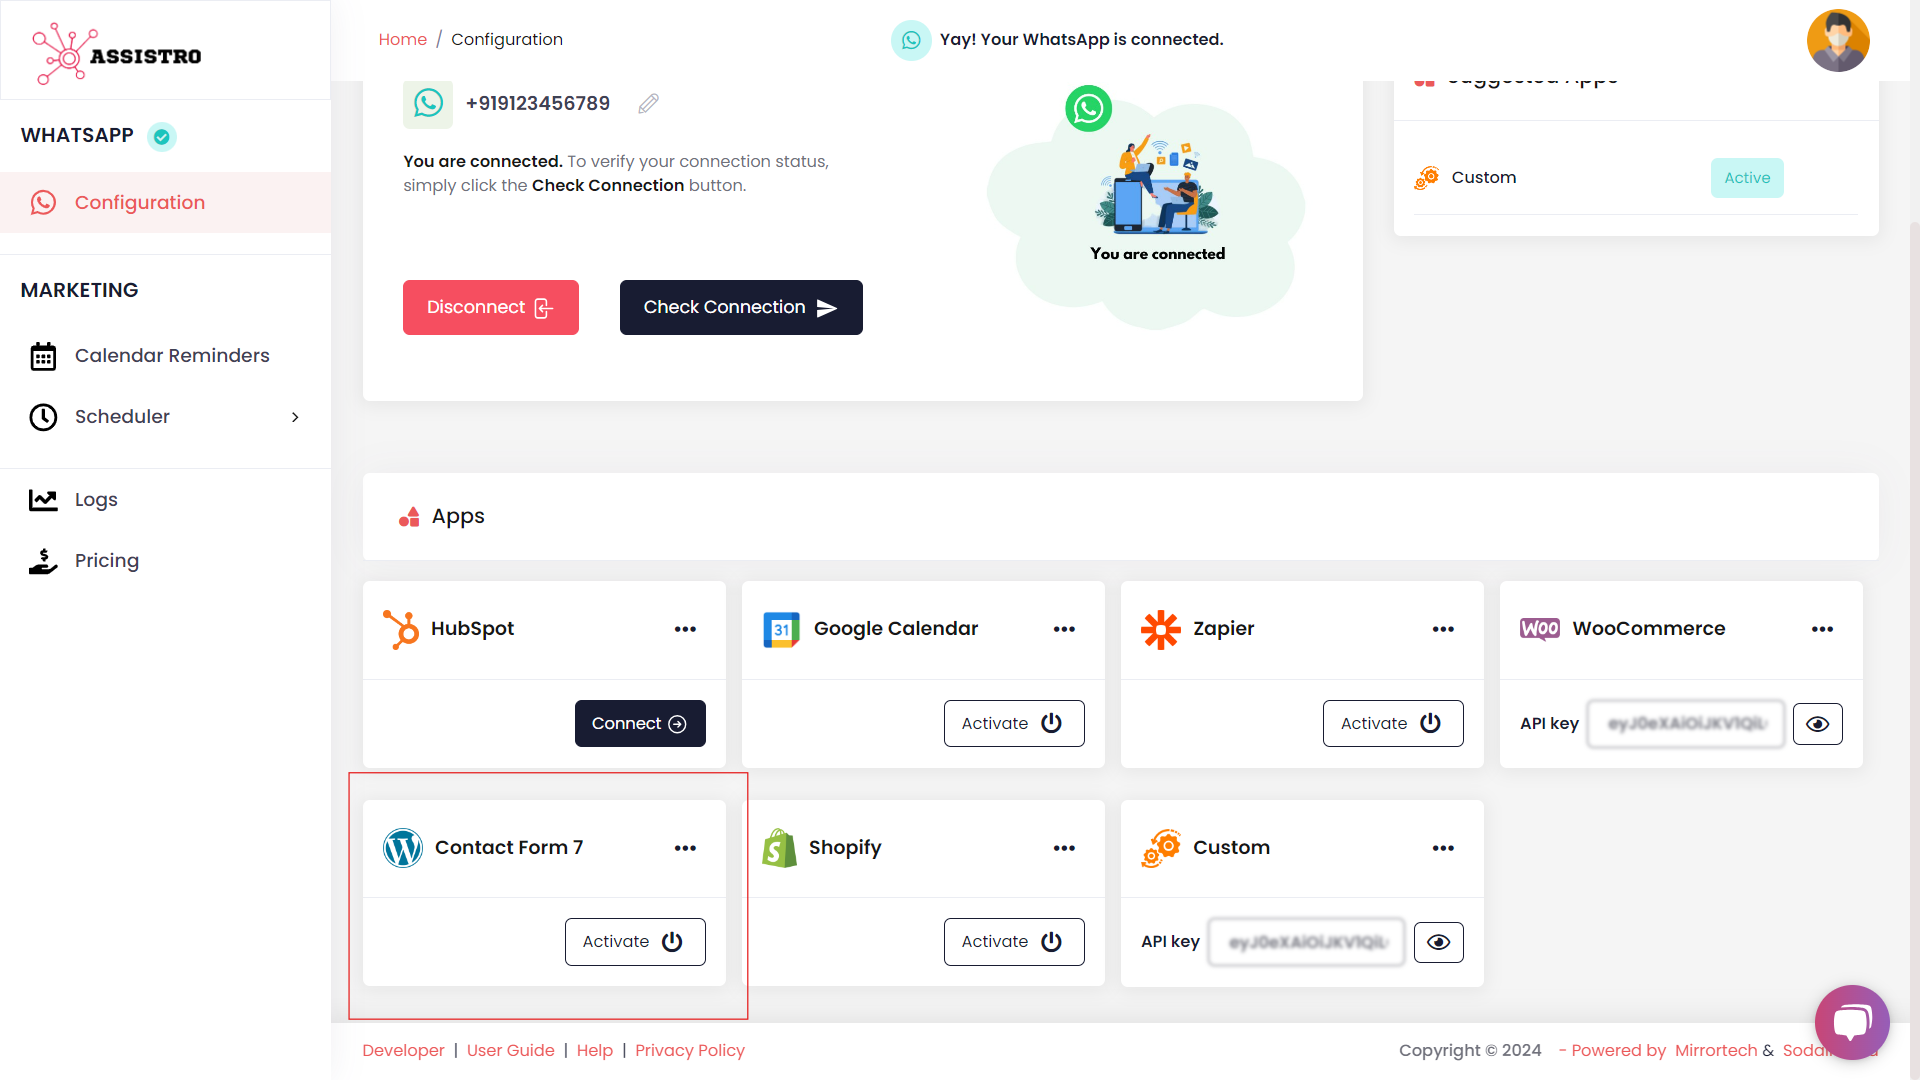
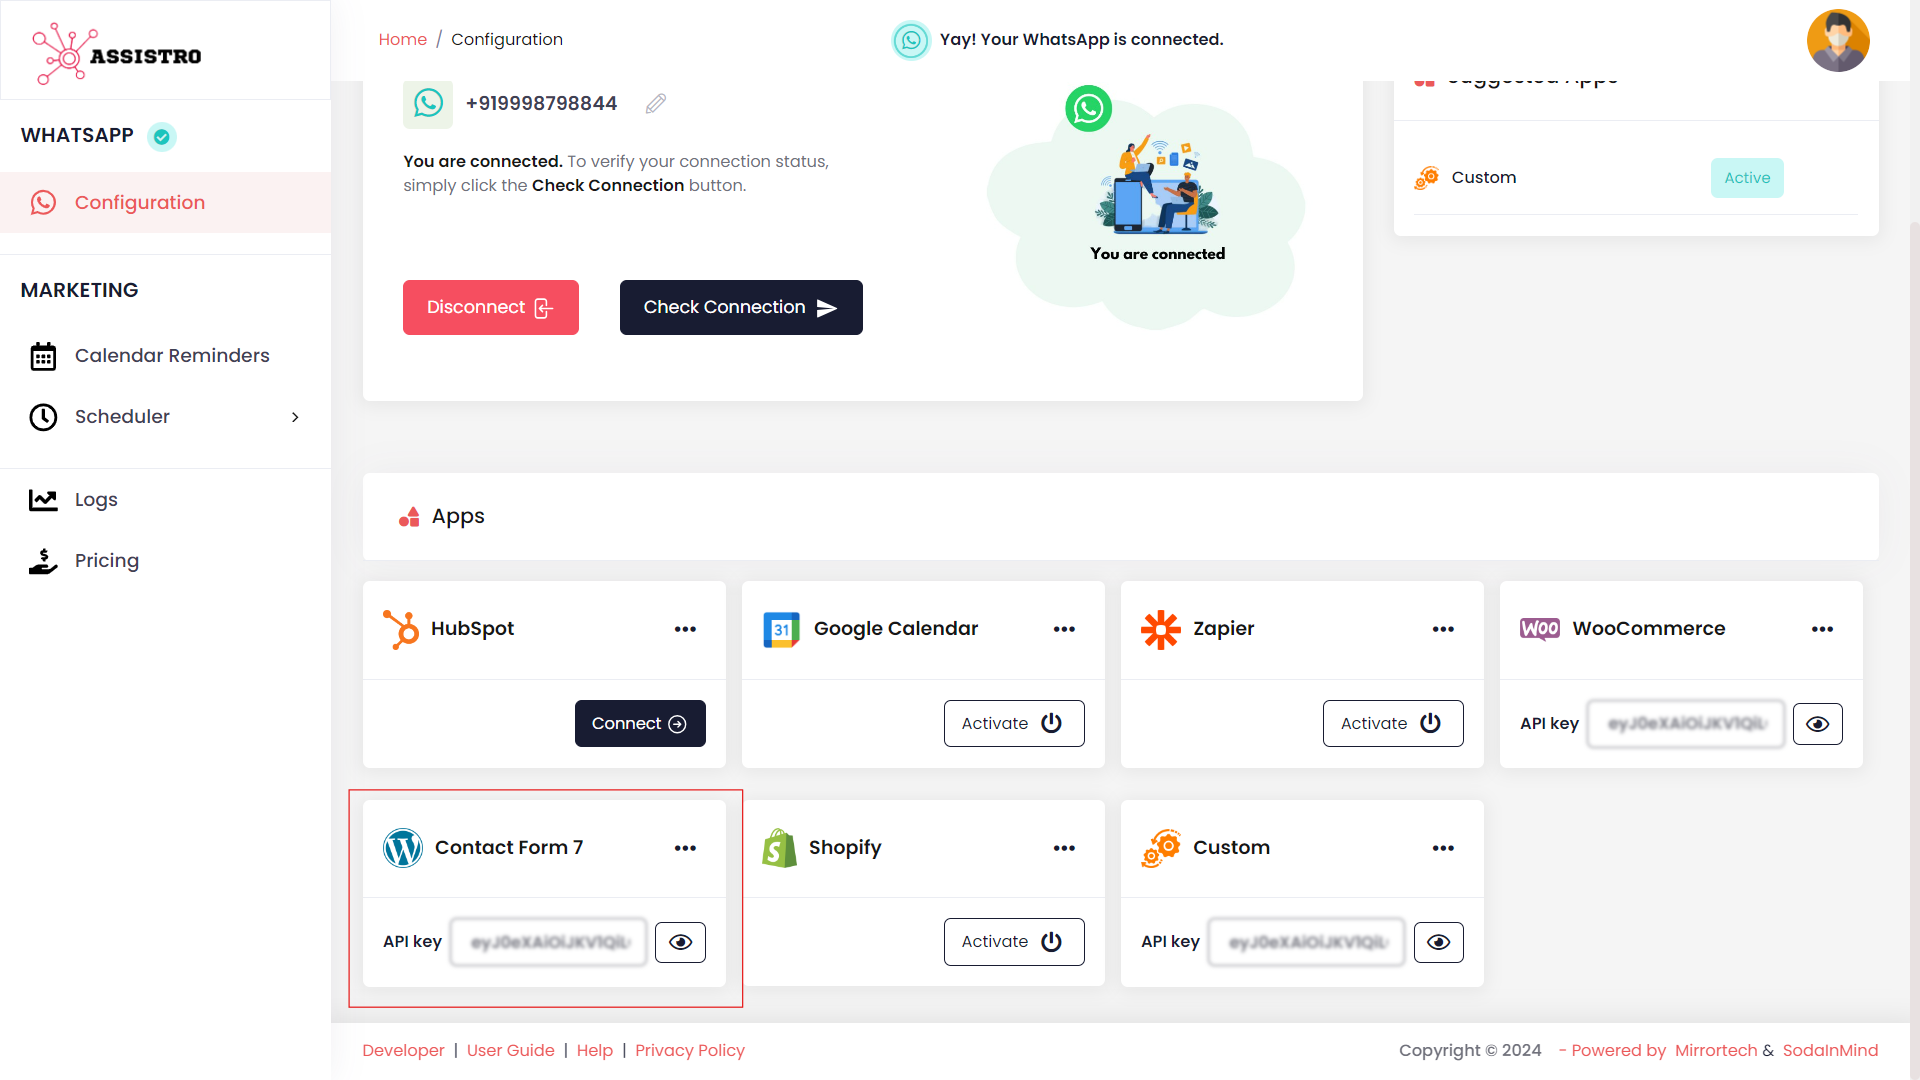
Activate the Contact Form 7 app.

Step 3
Then, copy the API key of Contact Form 7 app.

Step 4
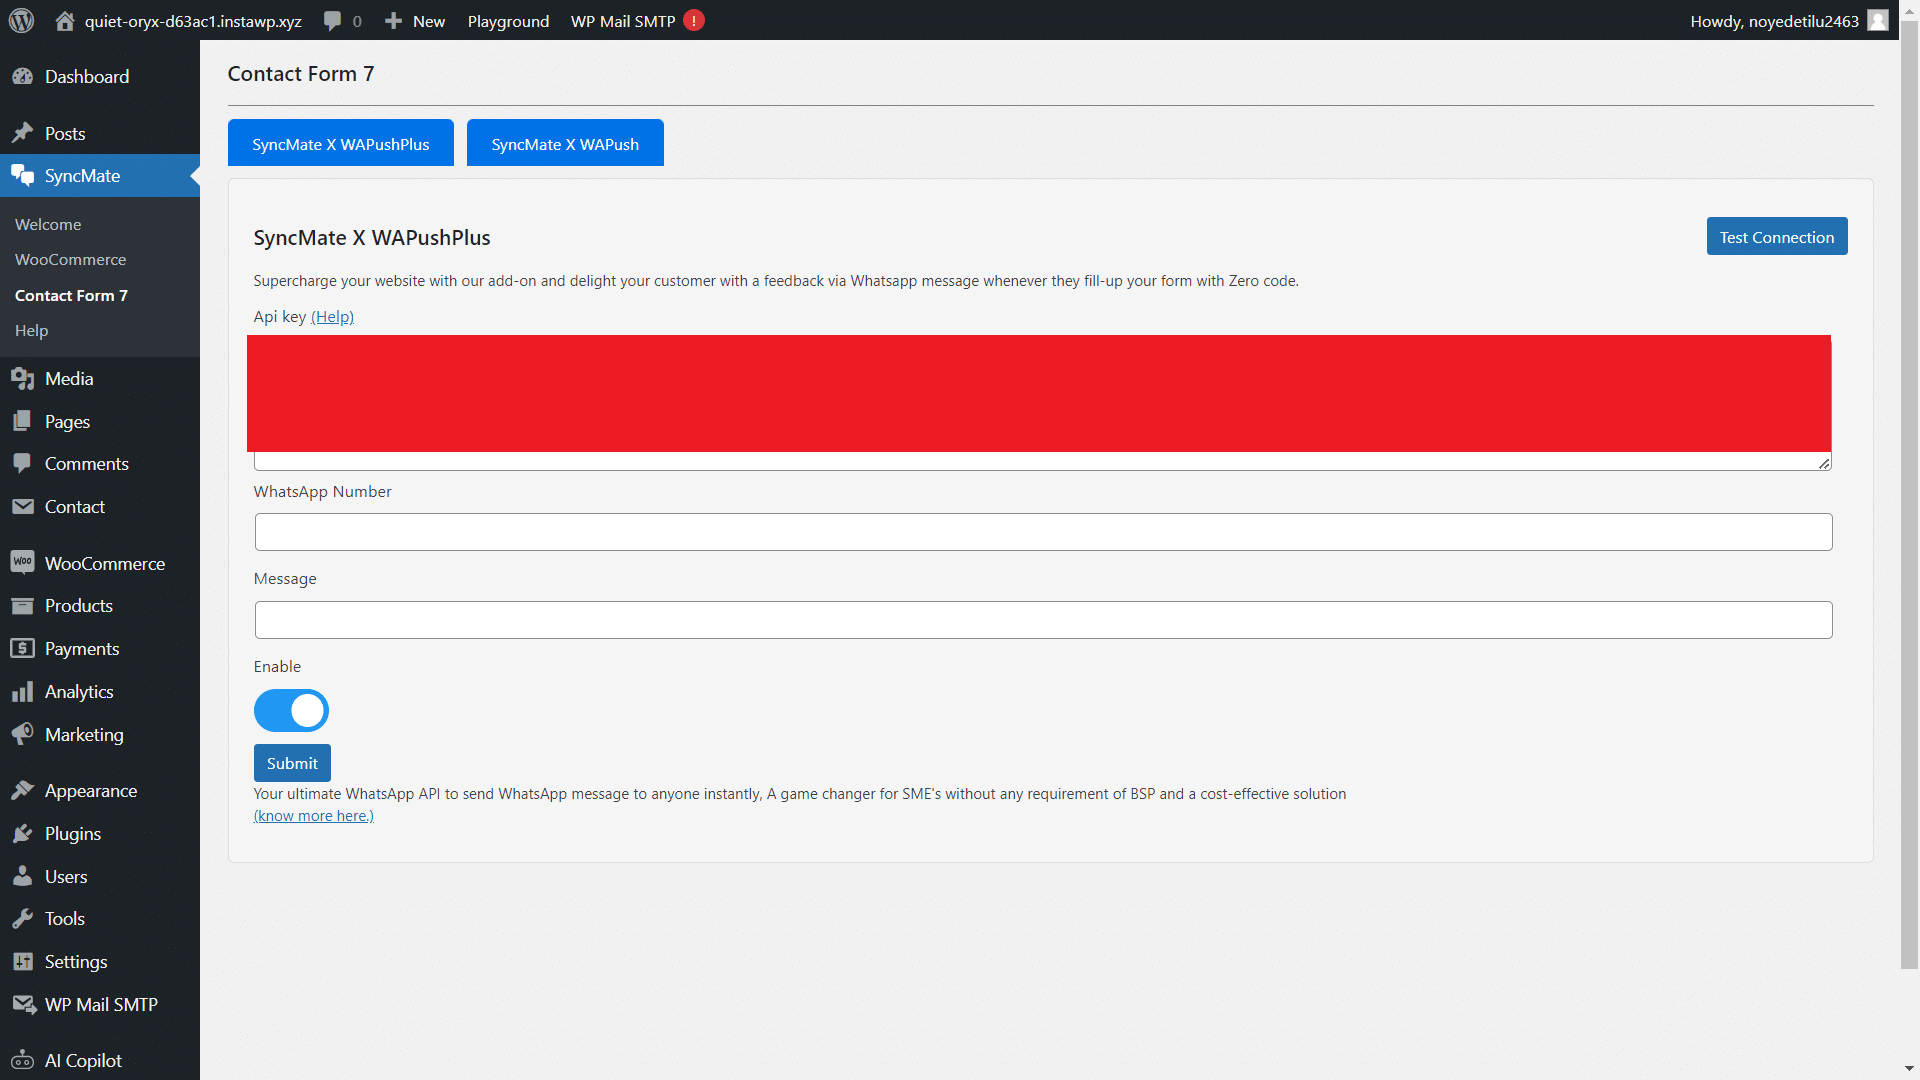
Now you need to install/download SyncMate plugin in wordpress or click here to install.

Step 5
Once installed, you will see SyncMate in the navigation bar, click on SyncMate, select WAPusPlus and setup your plugin with the required credentials and enable the toggle button to activate the plugin and save it.

Step 6
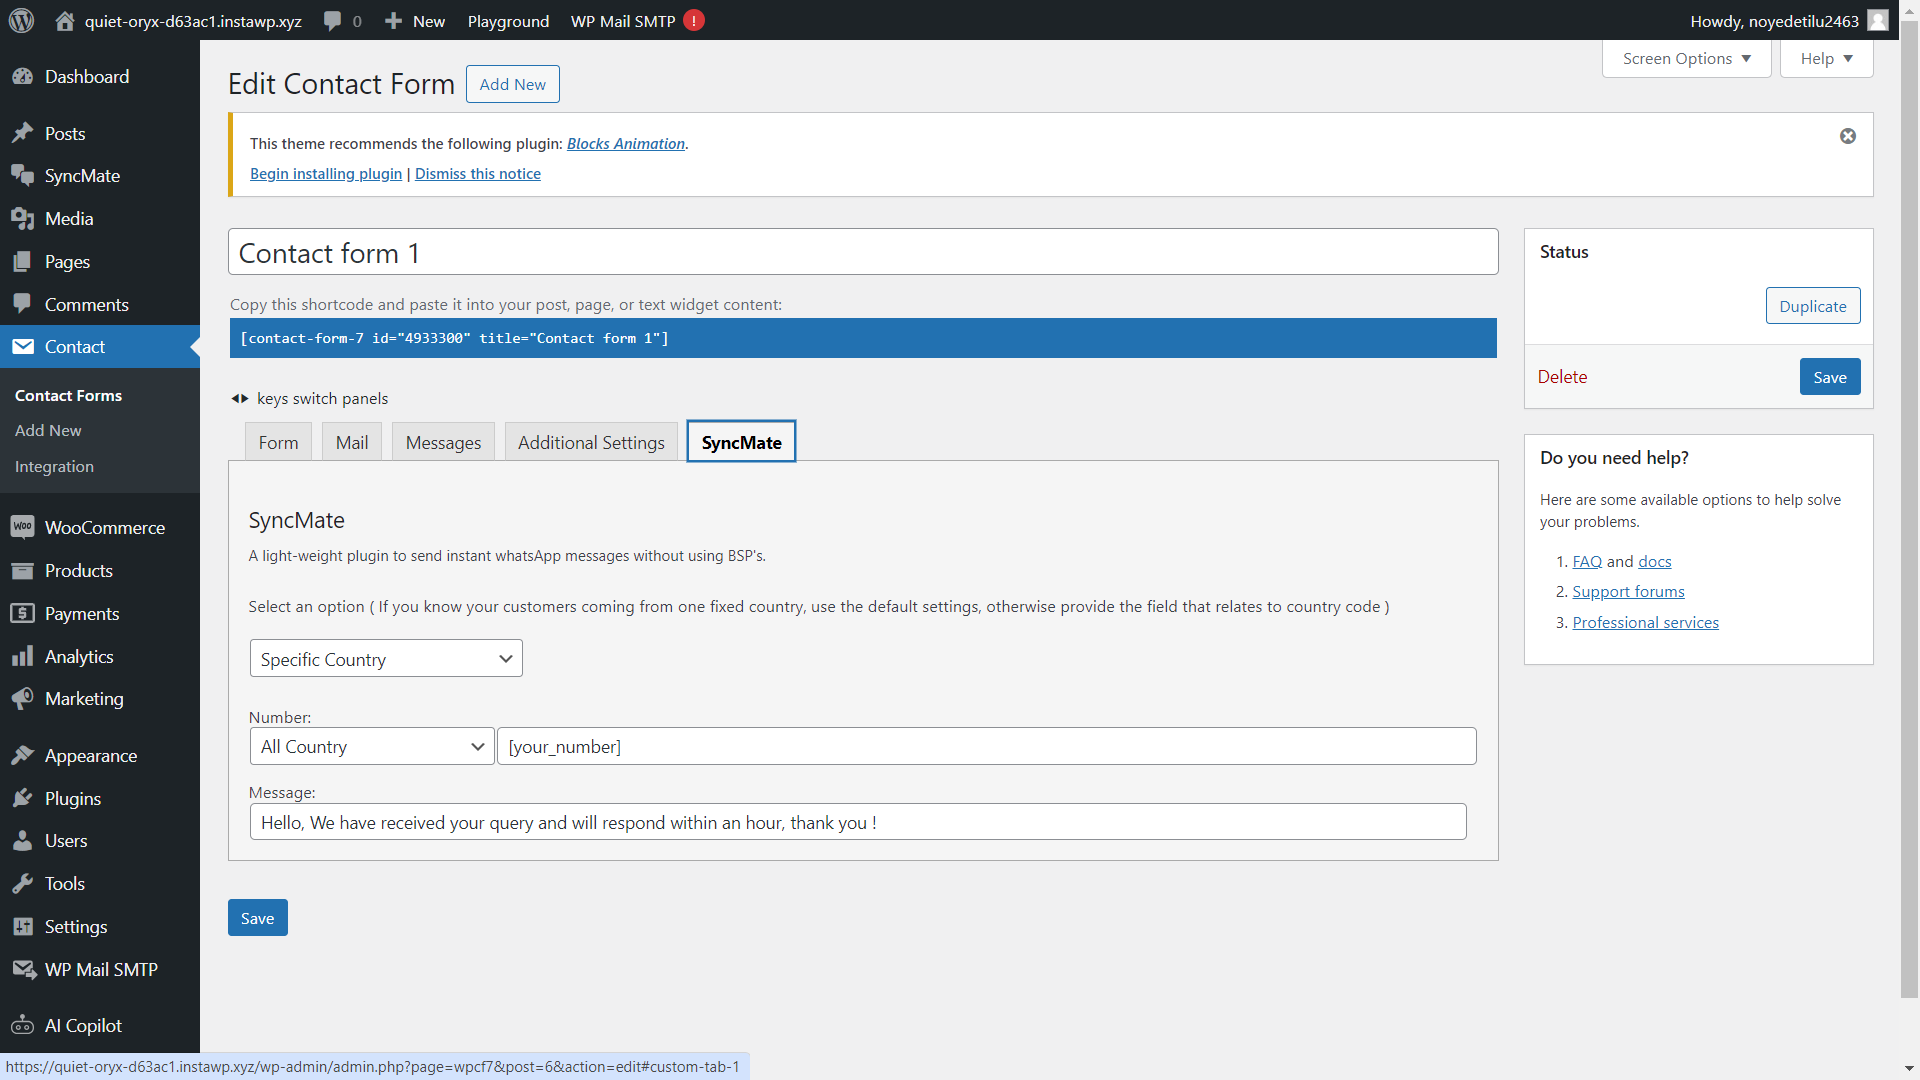
Now, go to Contact tab and select SyncMate, enter the required details and save i.

Step 8
That’s it, now WhatsApp messages will be sent to the WhatsApp number entered in contact form whenever a contact form is submitted with the help of WAPushPlus.

Updated on July 2, 2025

What are your Feelings

  • Happy
  • Normal
  • Sad
Share This Article :
  • Facebook
  • X
  • LinkedIn
  • Pinterest
Connect your WooCommerce App with SyncMateTroubleshooting and Reconnection Guide
assistro

We’re your innovation partner, delivering cutting-edge solutions that elevate your business to the next level.


    Navigation

    • Integrations
    • Pricing
    • Contact Us

    Integrations

    • Zapier
    • Shopify
    • Hubspot
    • Wordpress
    • Chrome Extension
    • Metro Accounting [Coming soon]
    • Flavor CRM [Coming soon]

    Learn 

    • Blogs
    • Developers
    • User Guide
    • Tutorials

    © Copyright 2025, All Rights Reserved by Assistro