Skip to content
assostro-header-logo
assistro
  • Integrations
    • Zapier
    • Shopify
    • Hubspot
    • WordPress
    • Chrome Extention
    • Metro Accounting (Coming soon)
    • Flavor CRM (Comming soon)
  • Learn
    • Blog
    • Developer Guide
    • User Guide
    • Tutorial
  • Pricing
  • Contact Us
  • Get Started
Get Started

SyncMate

9
  • Connect your HubSpot App with SyncMate
  • Connect your WooCommerce App with SyncMate
  • Connect your Contact Form 7 App with SyncMate
  • Troubleshooting and Reconnection Guide
  • How to use SyncMate X Shopify Application ?
  • How to send automated WhatsApp messages on Google Calendar events?
  • How to Send Message to a WhatsApp Group – Guide to Fetch Group ID
  • How to Connect your WhatsApp with SyncMate?
  • Connect your Custom App with SyncMate

Other

6
  • How to use SyncMate in a 3rd Party application via OAuth – The Secure way
  • Assistro Dashboard
  • After Installation : Setting up SyncMate Chrome Extension
  • Getting Started with SyncMate and Shopify Integration: A Step-by-Step Guide
  • How to back up your WhatsApp chats in HubSpot?
  • SyncMate User Guide: Regenerating Your Token

Extension

3
  • Define your own template to send schedule message
  • Send Message at a scheduled time using SyncMate
  • Bulk messaging at a scheduled time using SyncMate

Developer Guide

2
  • SyncMate User Guide: Regenerating Your Token
  • Connect your Custom App with SyncMate

Tutorial

2
  • Use WhatsApp API with Custom applications using SyncMate
  • SyncMate Introduction Video
View Categories
  • Home
  • user-guide
  • SyncMate
  • How to send automated WhatsApp messages on Google Calendar events?

How to send automated WhatsApp messages on Google Calendar events?

1 min read

In this guide we are going to see how to send automated WhatsApp messages on Google Calendar events.
Step 1
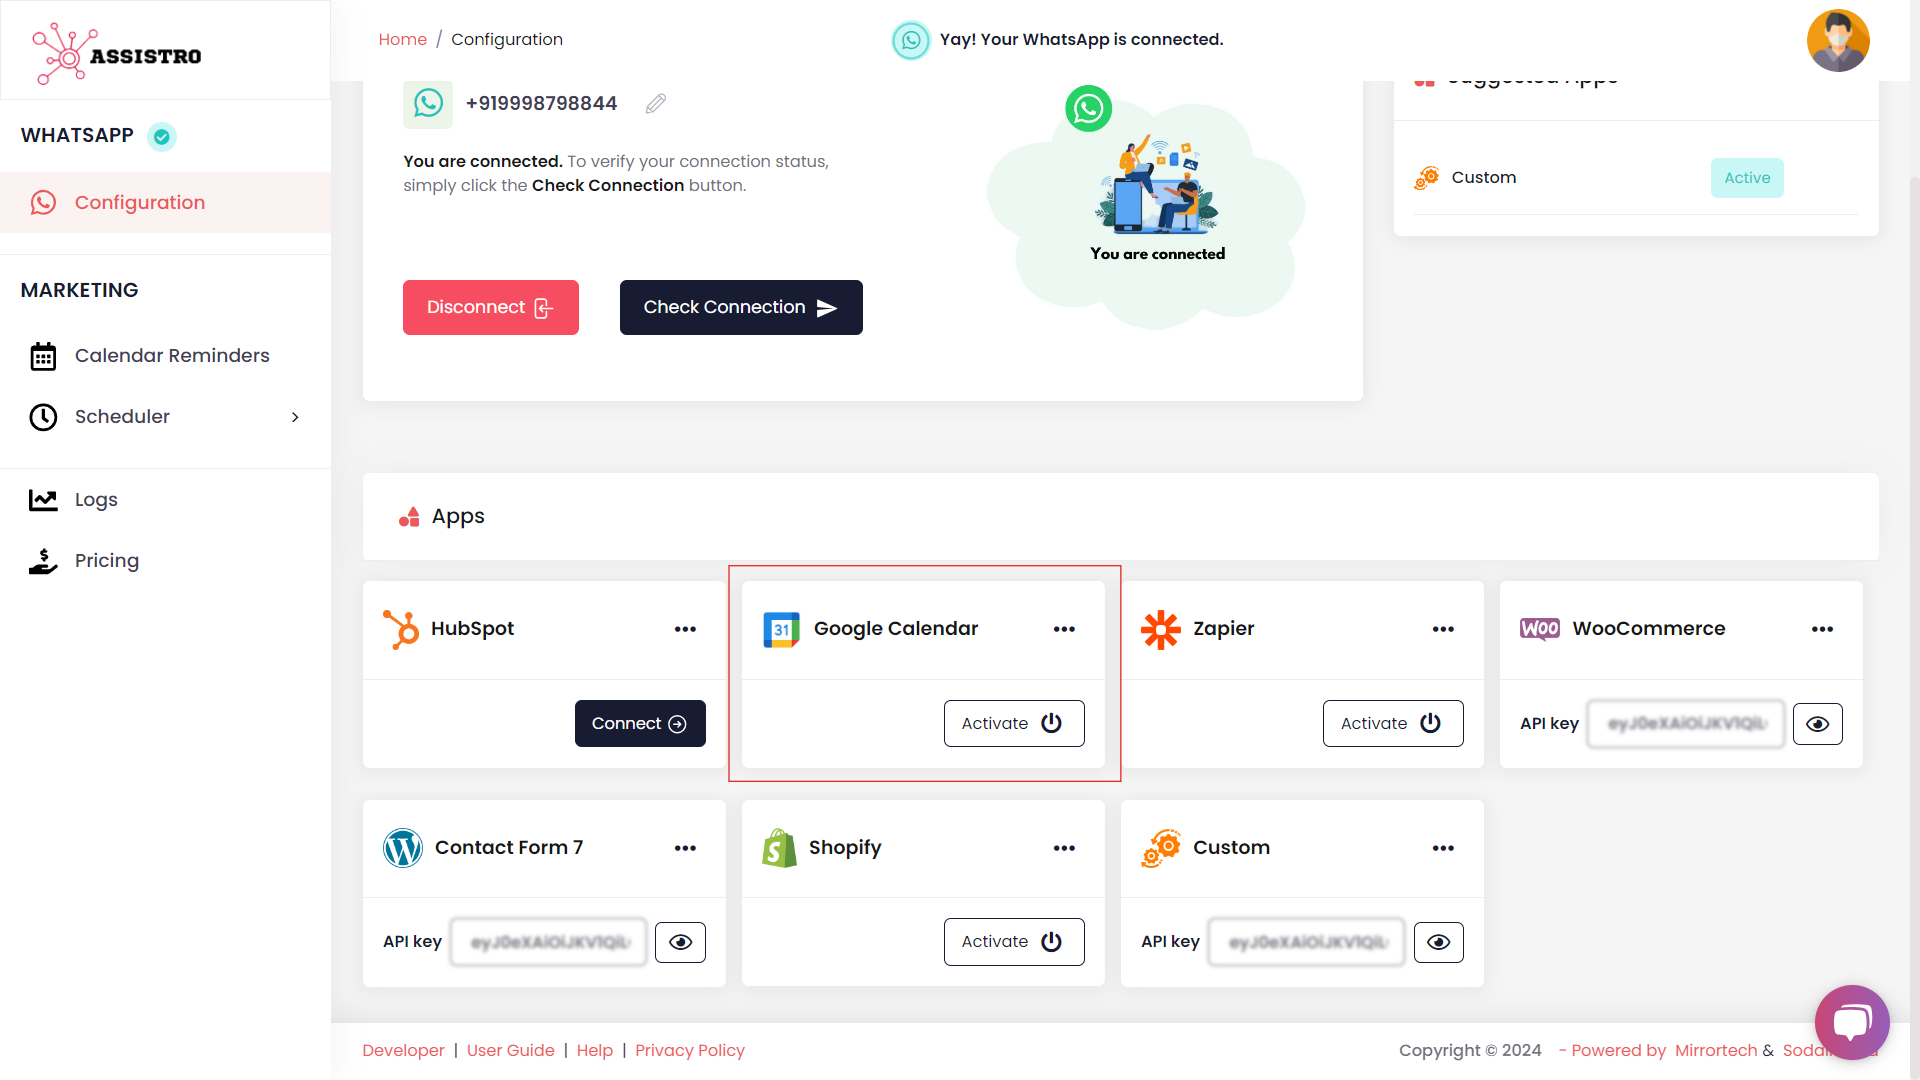
First of all, you will need to connect your WhatsApp with SyncMate, follow the Configuration guide.
Step 2
Once your WhatsApp is connected. Activate the Google Calendar app.

 
Step 3
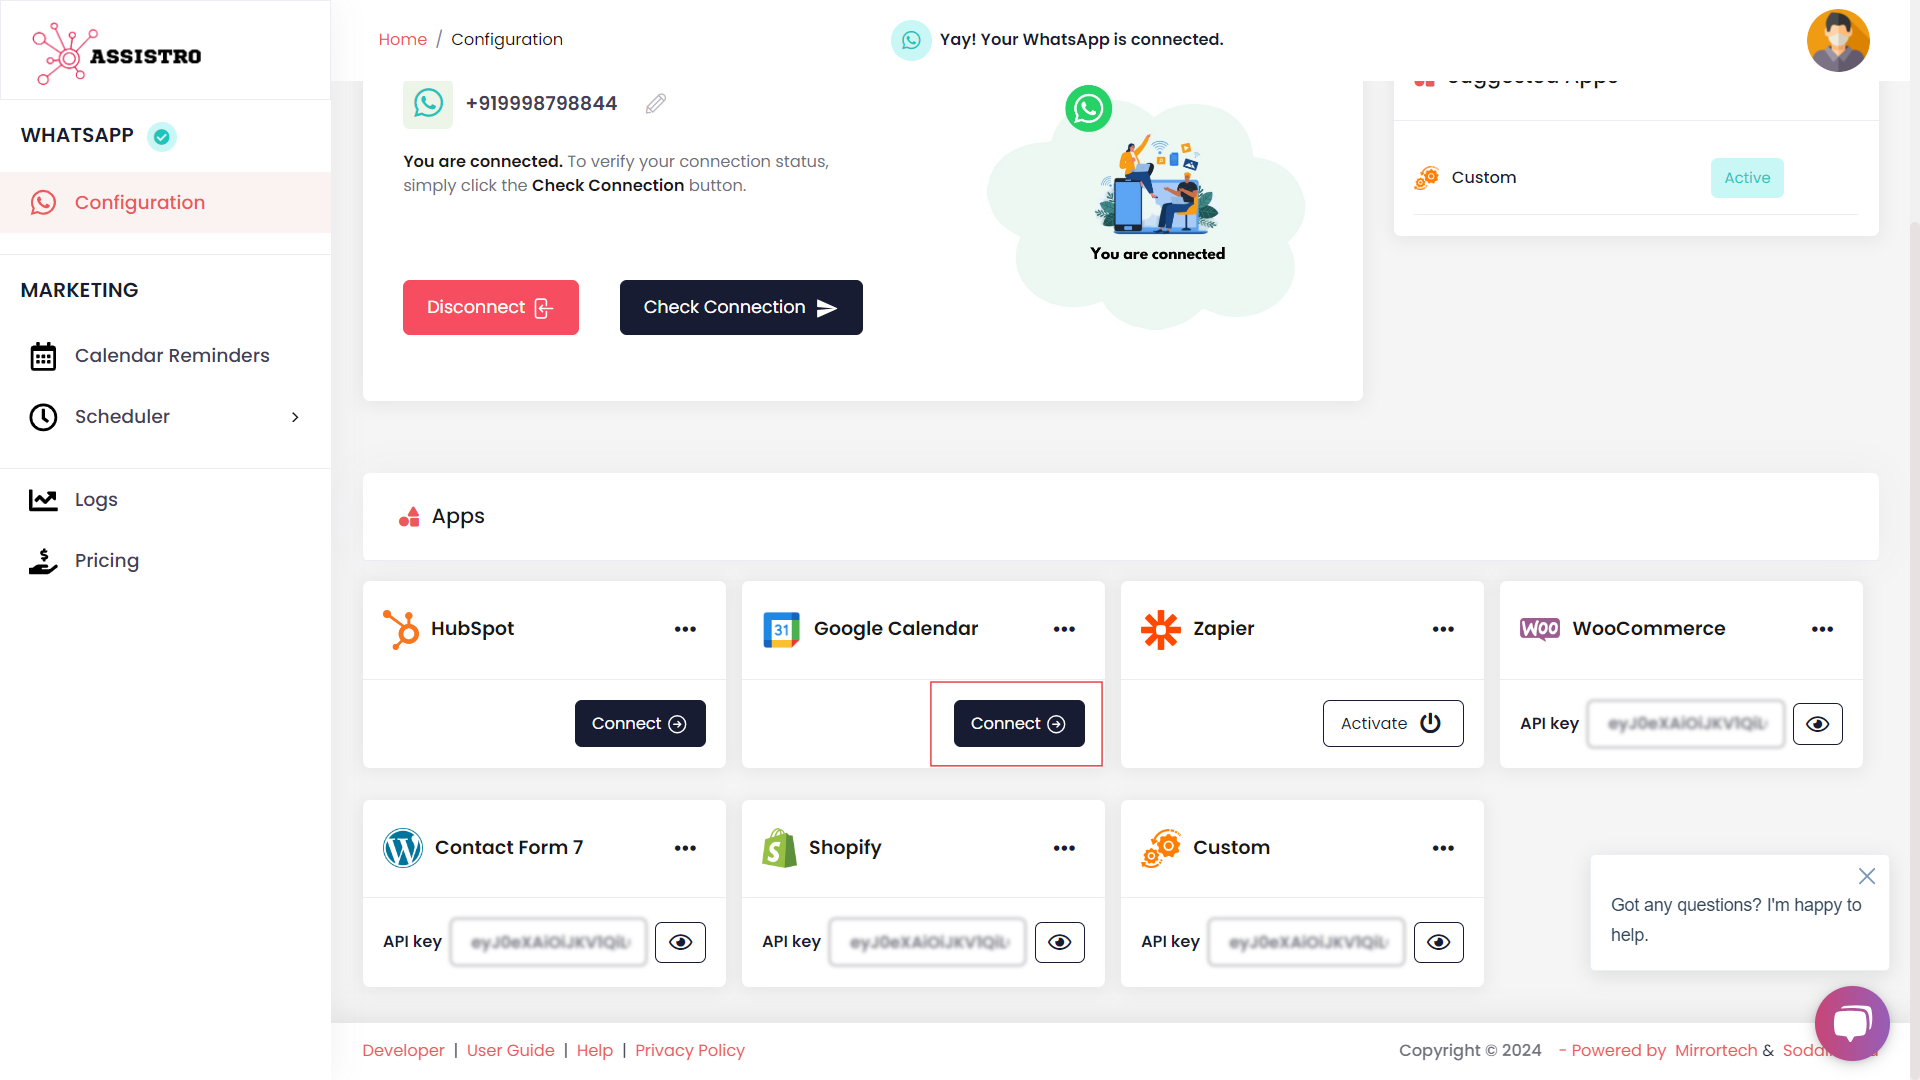
Then, Connect your Google Calendar with SyncMate by clicking on Connect.

 
Step 4
You will be redirected to the google Oauth page, Select your google account and Connect it.

 
Step 5
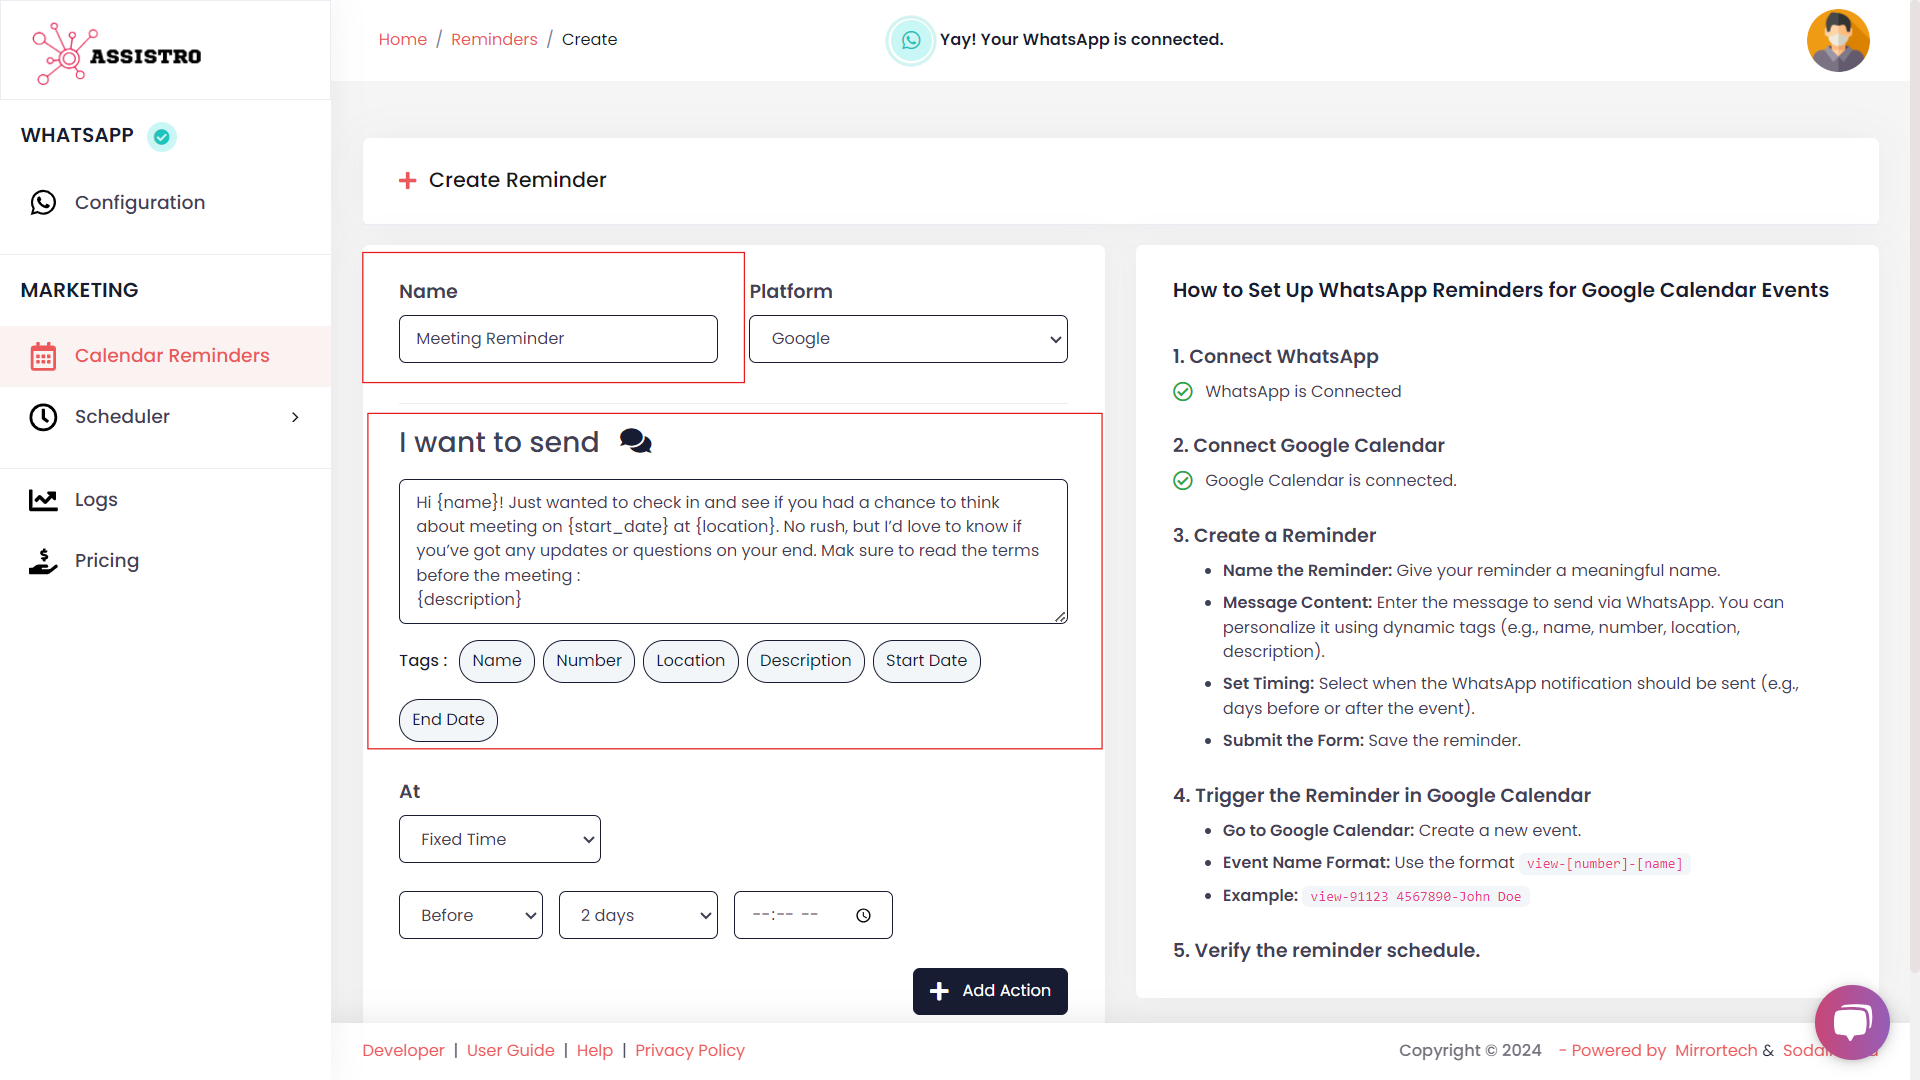
Once your Google Calendar is connected, go to Calendar Reminders & create a new reminder by clicking on “Create New Reminder“.

 
Step 6
Enter the name of reminder, message along with the dynamic tags for personalized touch.

 
Step 7
If you want the message to be sent on a fix time, then select “Fixed time”

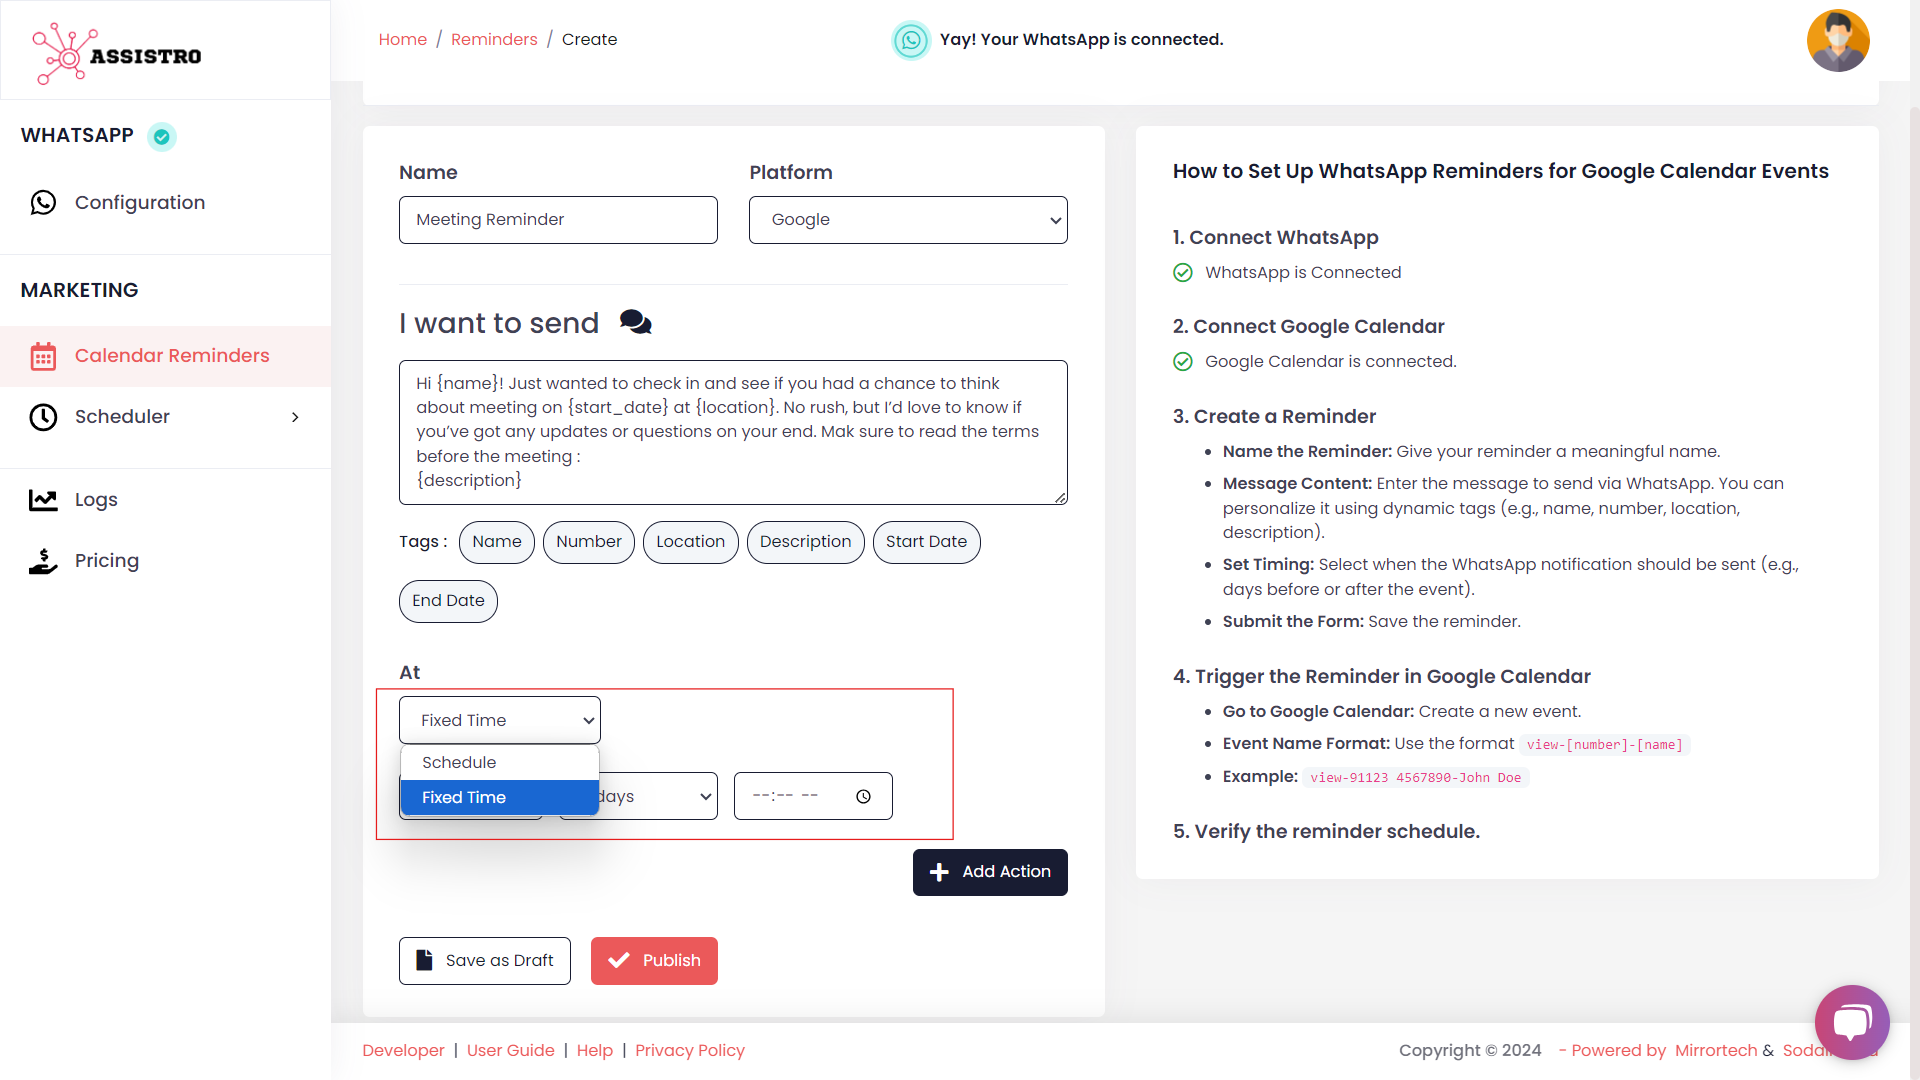
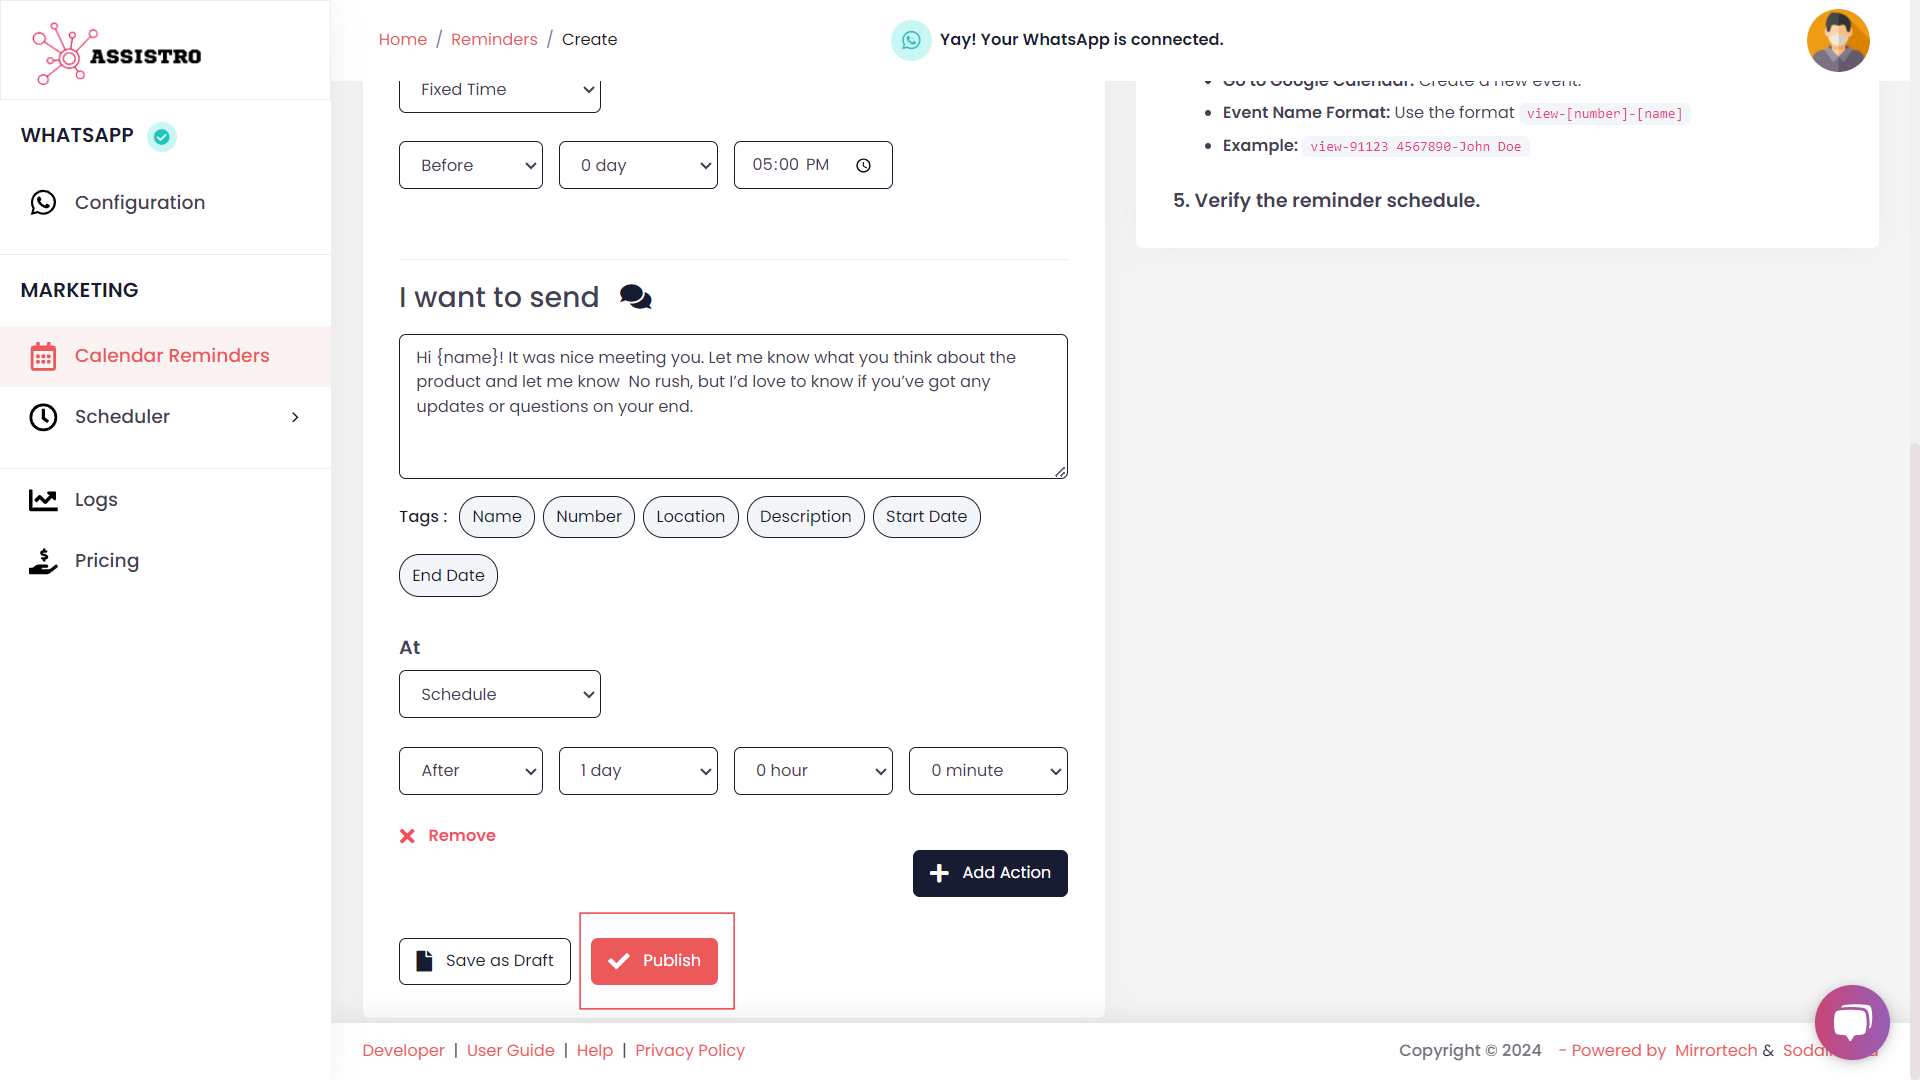
and if you want to send the message on a time period that is dynamic for e.g., before 4 hours or after 1 day of the calendar event, then select “Schedule”.

 
Step 8
Once you have filled all the required details, publish the reminder and go to your Google Calendar.
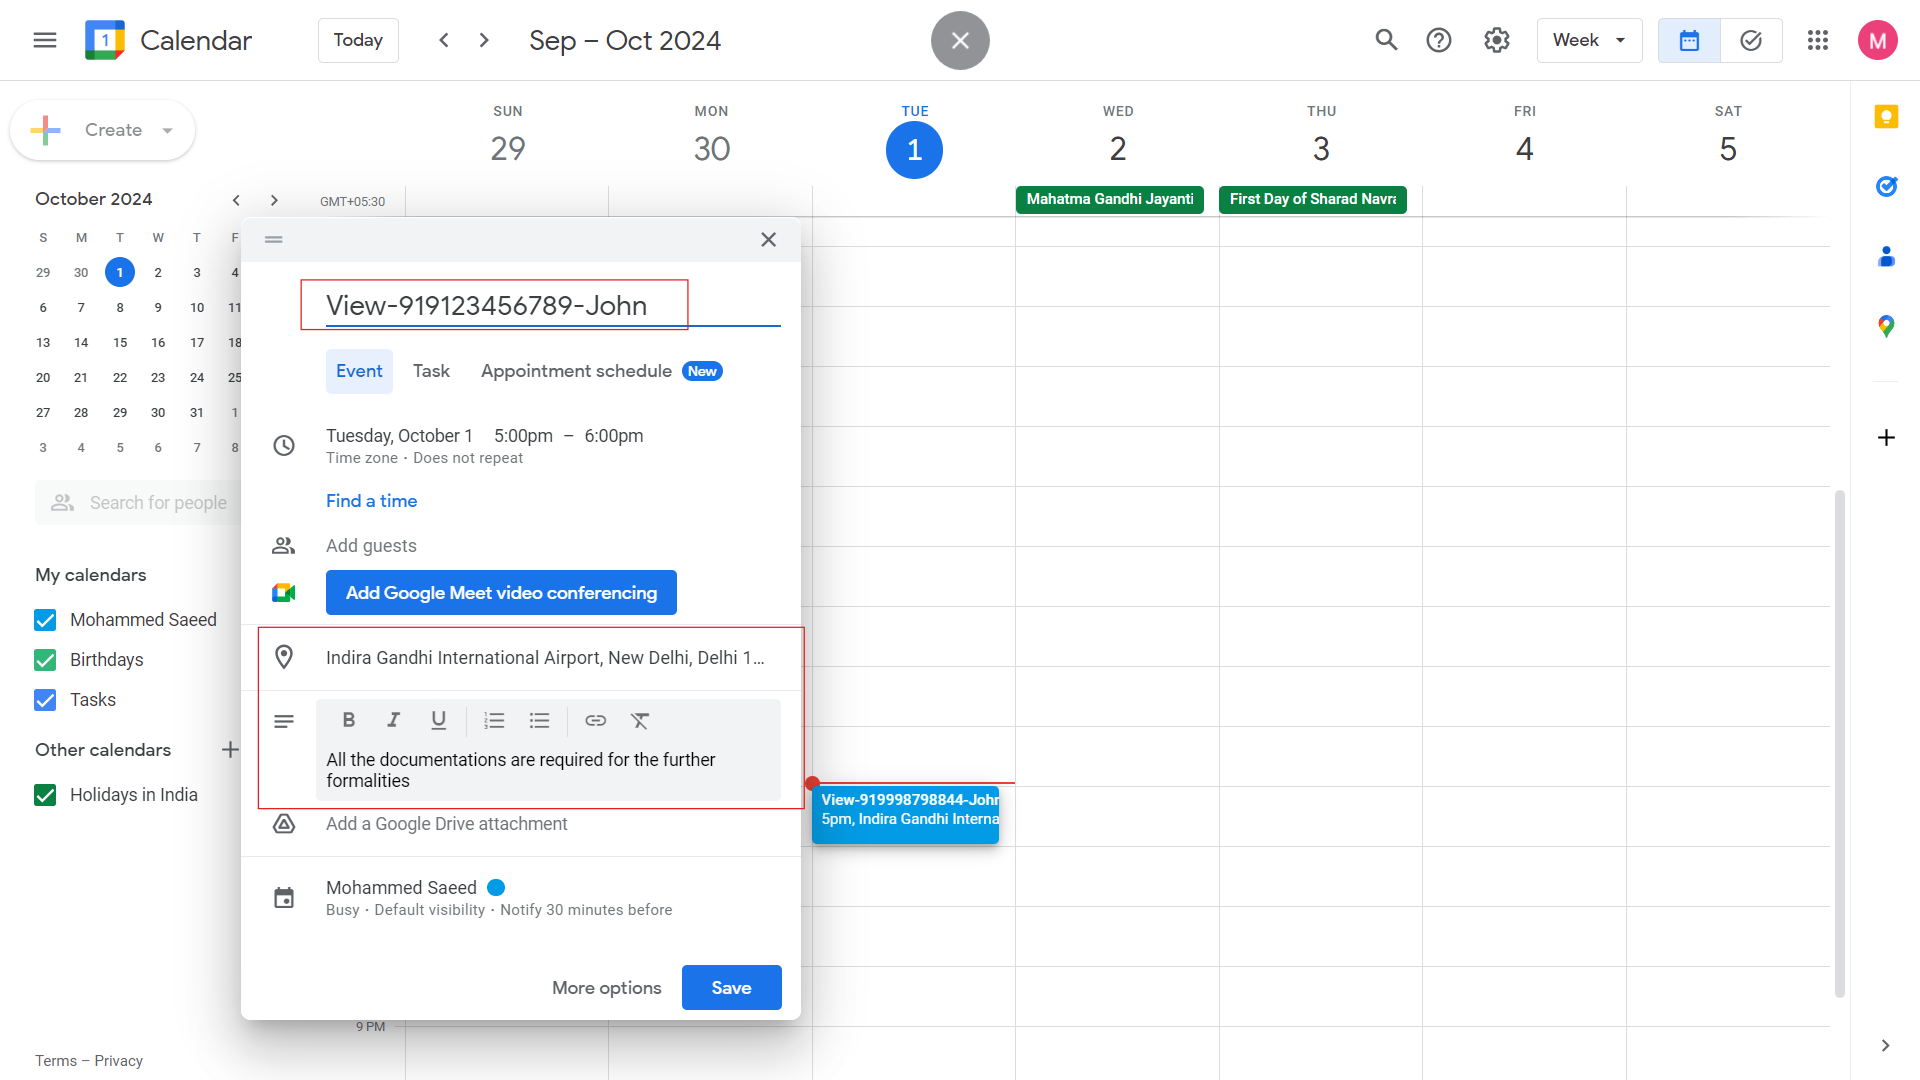
 
Step 9
Create an event on Google Calendar with a title in the view-[phone number]-[name] format, other details as per your rqeuirement and and save it .
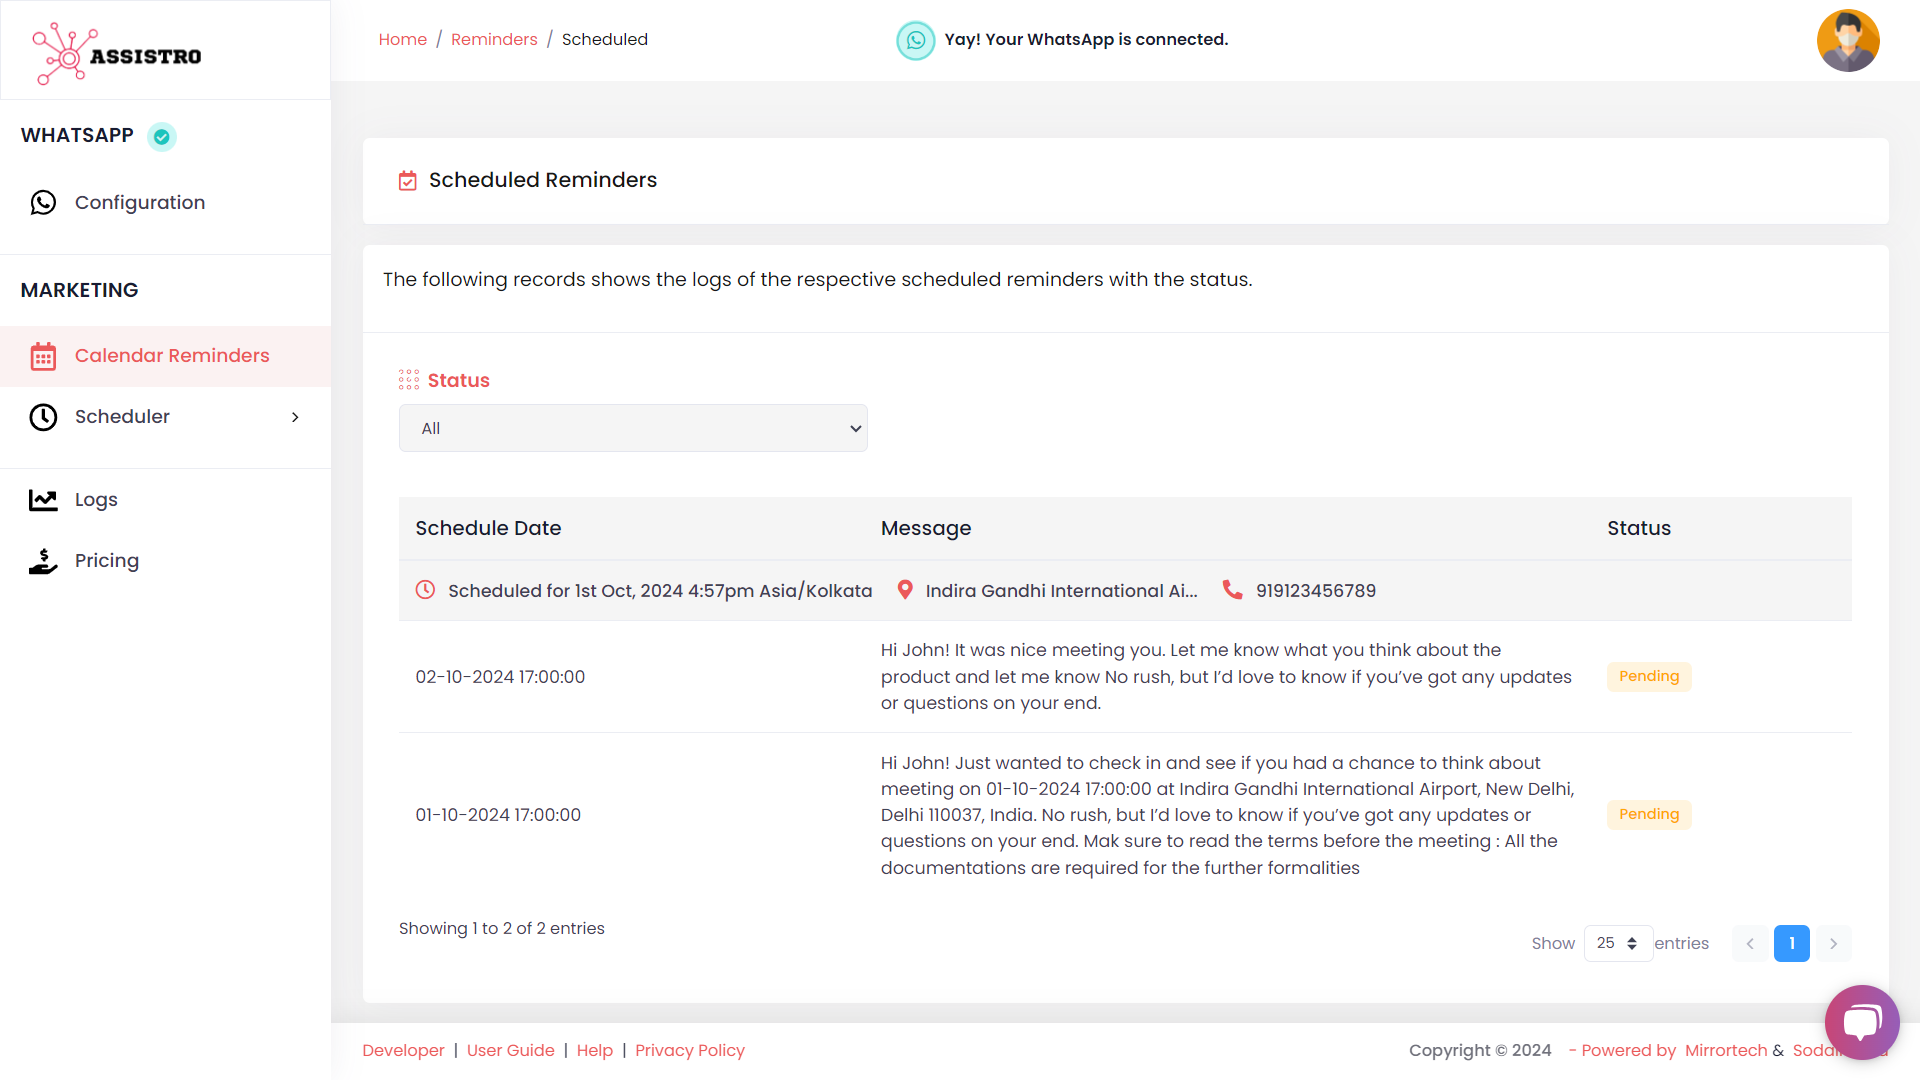

 
Step 10
Make sure to keep a track of all your reminders at the schedules page.
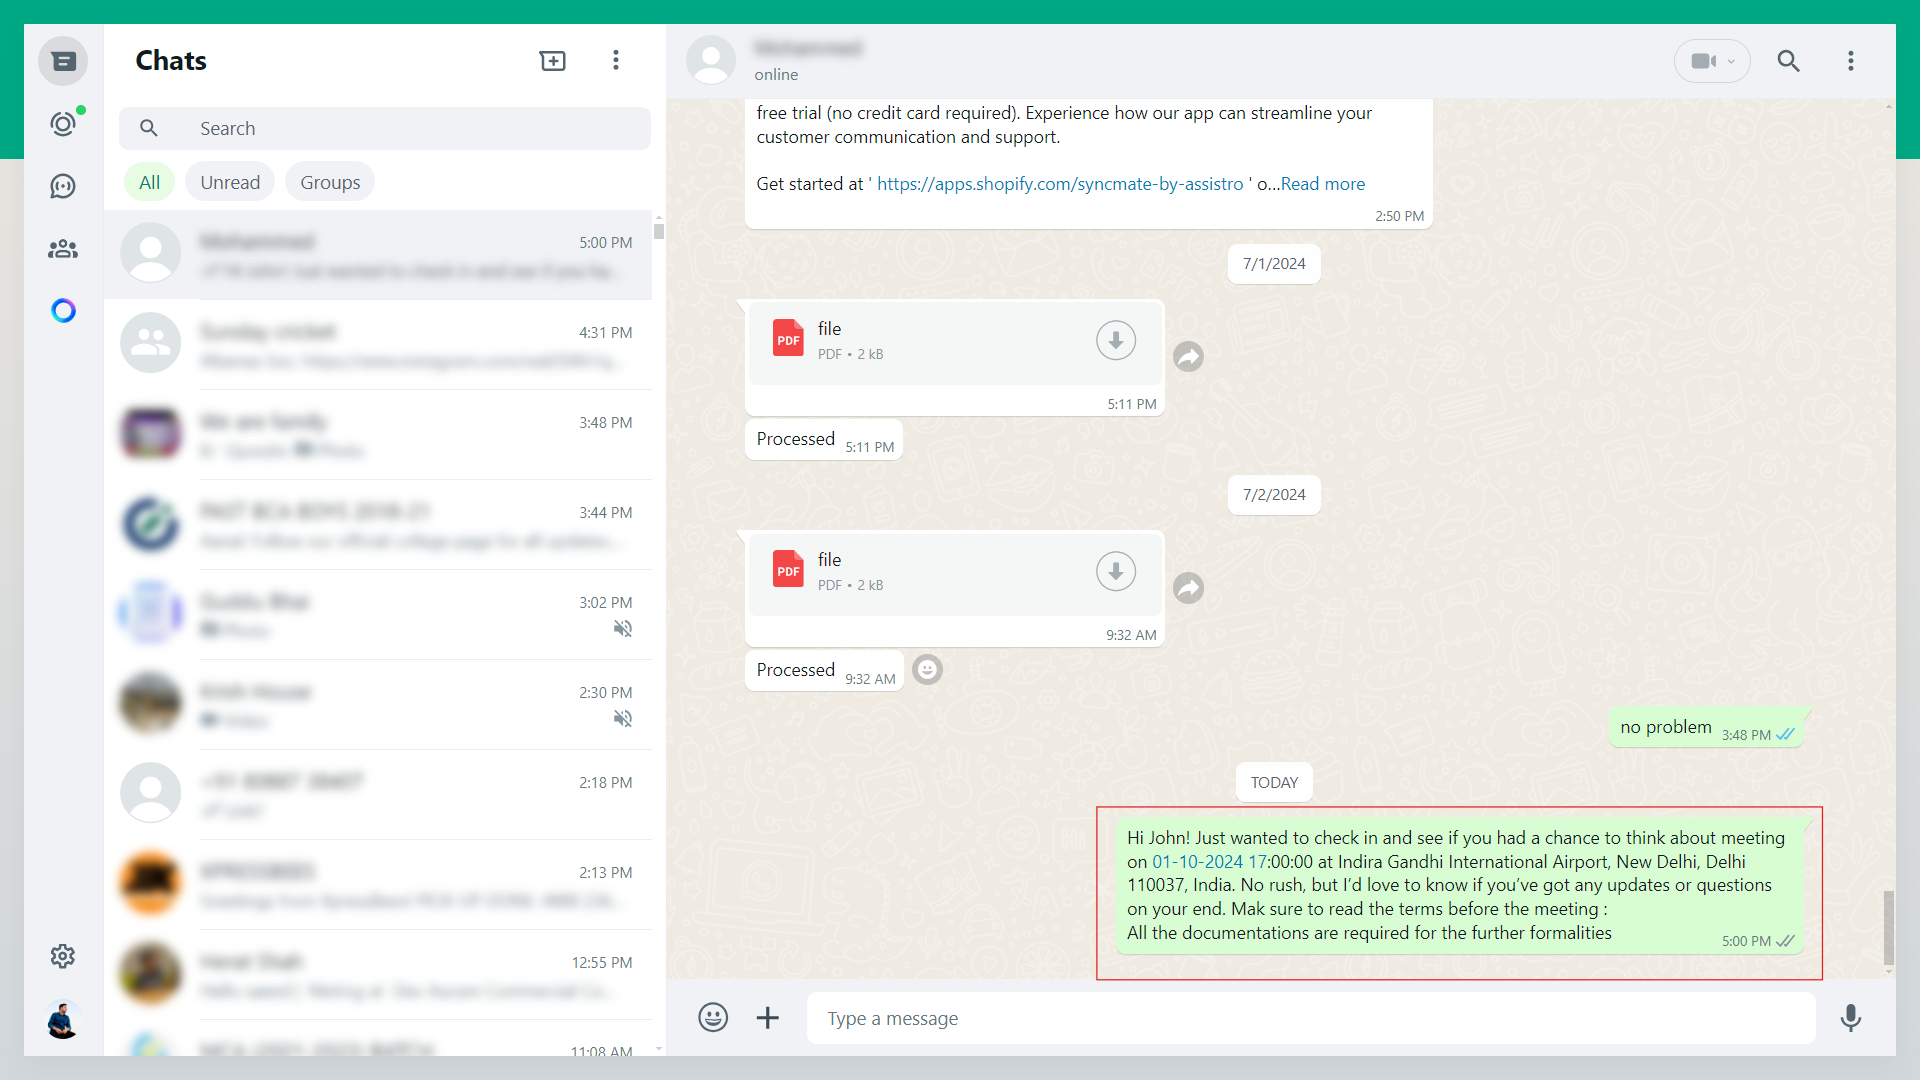
 
Step 11
That’s it, now the message will be sent to the respective recipient on WhatsApp at the time you have selected.

Updated on July 2, 2025

What are your Feelings

  • Happy
  • Normal
  • Sad
Share This Article :
  • Facebook
  • X
  • LinkedIn
  • Pinterest
How to use SyncMate X Shopify Application ?How to Send Message to a WhatsApp Group – Guide to Fetch Group ID
assistro

We’re your innovation partner, delivering cutting-edge solutions that elevate your business to the next level.


    Navigation

    • Integrations
    • Pricing
    • Contact Us

    Integrations

    • Zapier
    • Shopify
    • Hubspot
    • Wordpress
    • Chrome Extension
    • Metro Accounting [Coming soon]
    • Flavor CRM [Coming soon]

    Learn 

    • Blogs
    • Developers
    • User Guide
    • Tutorials

    © Copyright 2025, All Rights Reserved by Assistro